

This post is a continuation of a series suggested by a friend, detailing the rationale and process of selecting lighting for my wife’s and my new rehabbed home. In this post, I’ll discuss the lighting of the bathrooms.
Prior to this home, we lived in a house that was listed on the National Register of Historic Places, one of 81 French Norman style home built on the former Cleveland Heights / East Cleveland estate of John D Rockefeller, by his son John D Rockefeller, Jr. To remain as true to the original concepts, we made no change to the exterior and very few substantive changes to the interior. Consequently, the bathrooms featured all the original fixtures and tile. This was the bane of my wife’s interaction with the place. It became especially egregious when she broke her ankle. The bathroom was probably the single most significant reason we moved. The amount of steps could definitely arm-wrestle the bathrooms for that title, but that is not the point of this particular examination.
Aside from dealing with a tub, she was also dissatisfied with the lighting. One vanity strip over the mirror was all I could do in each of the four bathrooms. Of course, her face (and mine) fell into shadows. In addition, she was unable to easily shave her legs in the shower. Nighttime bathroom visits could be akin to sailing through the Strait of Hormuz. With a new house, I already had the list of problems that needed solving.

Two Unusable Rooms
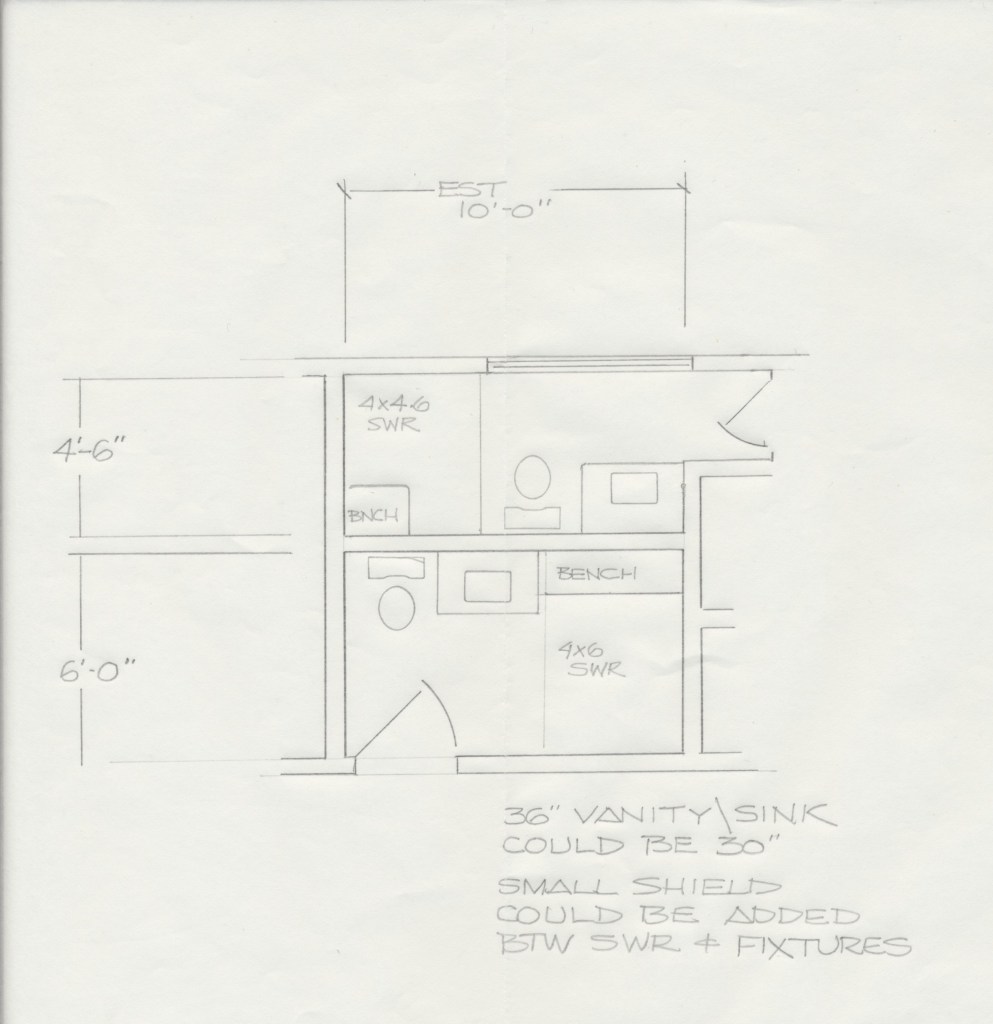
The main bathroom in the new house was remodeled at some point in the 1980s with a dark wood vanity. In the last decade a “walk-in” tub was installed. This was an easy decision. We planned to demolish the whole room, “borrow” 18” from the adjoining TV Room and turn it into an accessible bathroom. We moved the door, changed it to a 36” opening and planned for a “wet bath” with no curb, no shower enclosure, grab bars and a built-in bench with handheld shower wand option. If she or I became wheelchair bound, we could stay in the house and stay clean.

The second bath was all original. It was a funky blue with a small, original multi-head shower cabinet. The tile was in surprisingly good condition. The sink was okay and the cabinets had seen better days, but we planned to keep it, fix it and revel in its 50s charm.
During the demo, the GC called. The new tub had apparently been leaking…for a long time. The water had rotted through the main joists that supported both bathrooms. It is likely that the original shower cabinet was also leaking. The lead pan under it was deteriorating. They could not save the second bathroom. New floor joists would need to be installed across the entire span, complicated by what the contractor said was a missing support pier. (We noticed sagging floors in the area and that was the reason.) Both back-to-back bathrooms would need to be demolished.

We had already agreed to take space from the TV Room, so we now had the capacity for two well-sized rooms. We agreed that my wife would use the larger, accessible bathroom and I would take the (somewhat) smaller one. I sketched out a plan for the divided space, provided a vanity concept that would be used in both and the contractor got to work building his and her wet baths.

Lighting
Over the years, shower stalls have gotten larger and larger, but most still have a single recessed unit overhead. In an approximately 6’-0” wide space, I knew shadows would be a problem, so I specified two medium beam angle recessed cans in each. As in the rest of the house, I used the Nora Sapphire III product.
My wife wanted a blue bathroom. The GC/K&B specialist found a white porcelain with blue veining that she immediately approved. We matched the dense blue to a paint that was used on the vanity and the wall surfaces that were not porcelain. She also wanted chrome fittings.
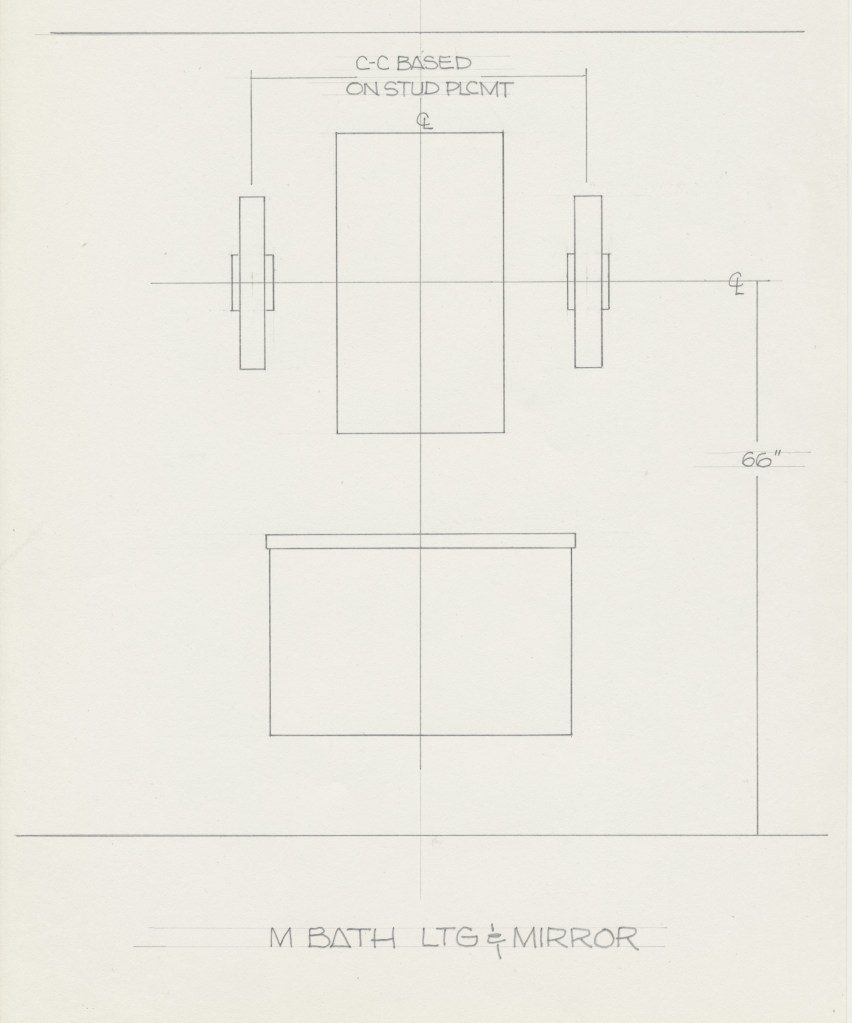
I explained that the lighting would be positioned on each side of the mirror to provide her with the right amount of light, unlike the old place. I’d also include a recessed can over the sink, to deliver light from three directions, thereby eliminating shadows. I had already sketched pendants at each side of the mirror in the bath concept. She told me she did not want pendants, so I gave her a curated list of long linear sconces from which to choose. A quick trip to the local lighting store and she affirmed one of the options, the Modern Forms Vogue 20” sconces.
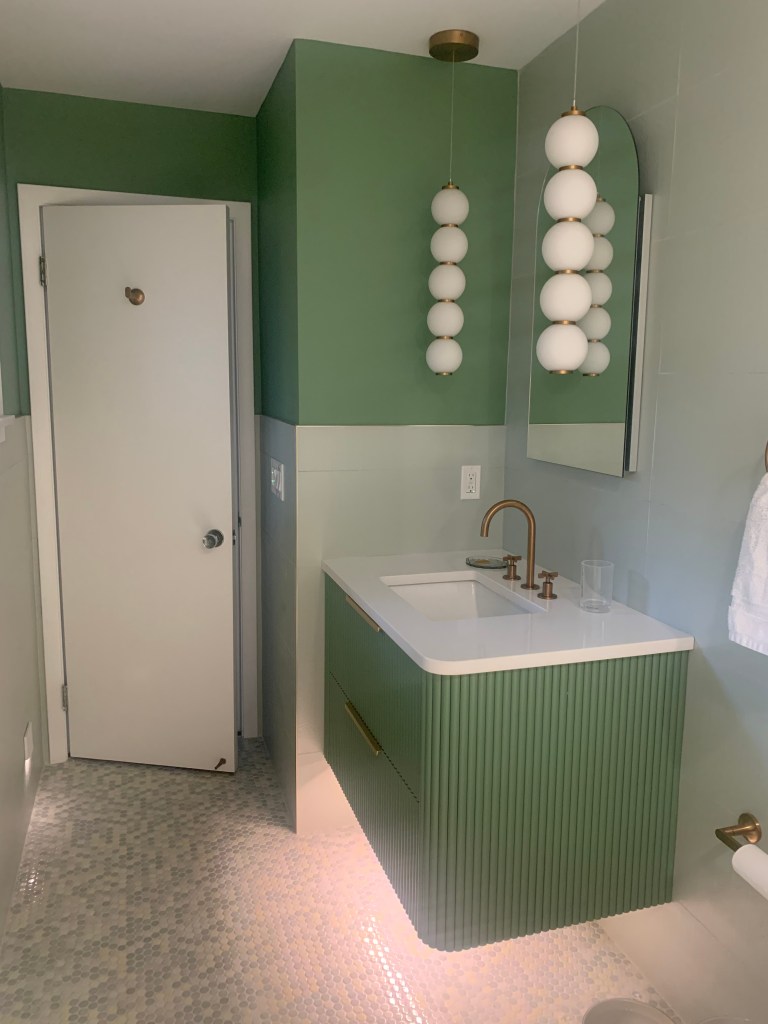
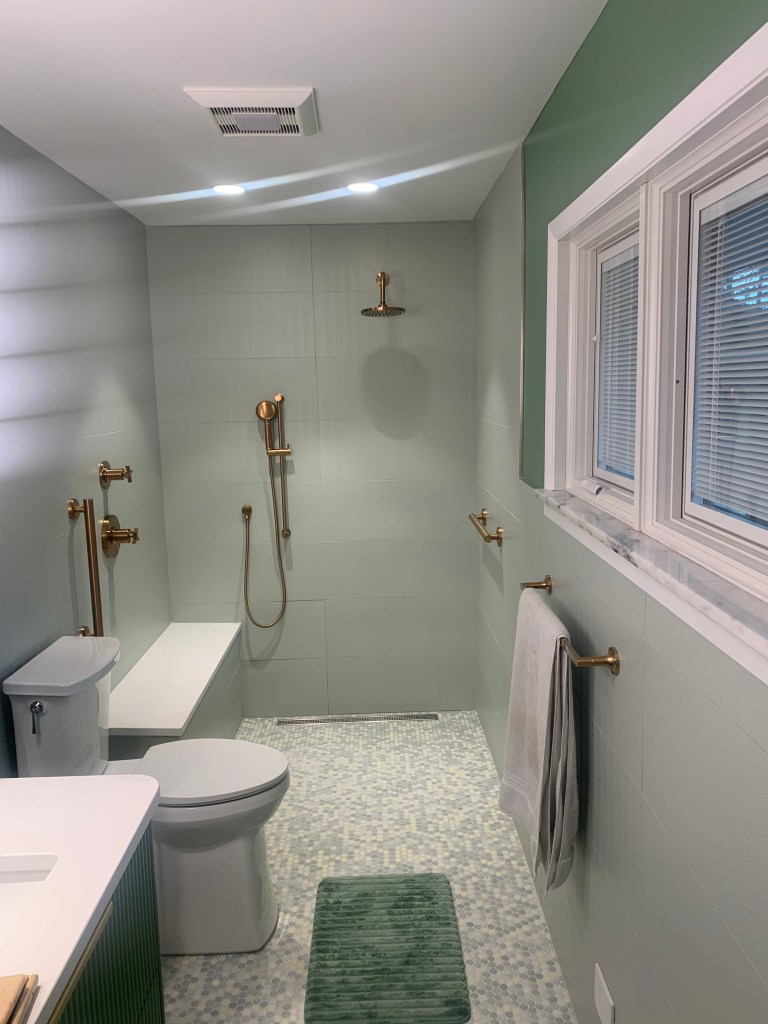
I believe green will be the next popular accent color, replacing blue which has enjoyed a great run. I wanted the exact same porcelain as hers, but with green veins. “Sorry. Not available.” Interestingly, there is virtually no green vein or green accented porcelain or ceramic tile on the market. The GC called all of his sources and we visited almost every tile house in the county and found only three options. I found some online, but didn’t want to pick something so important without seeing it live. I finally agreed on a celadon tile with feather vein texture. Unfortunately, they did not make a version for floors, so it took the contractor another month to find a multi-color penny-tile that matched perfectly. To complement the feel of green, I went with brass fixtures and fittings. The lighting I wanted was in my original sketch. The Kuzco/Alora Bijou pendants. I selected the 5” (5 sphere) model because of the tight space to the left.
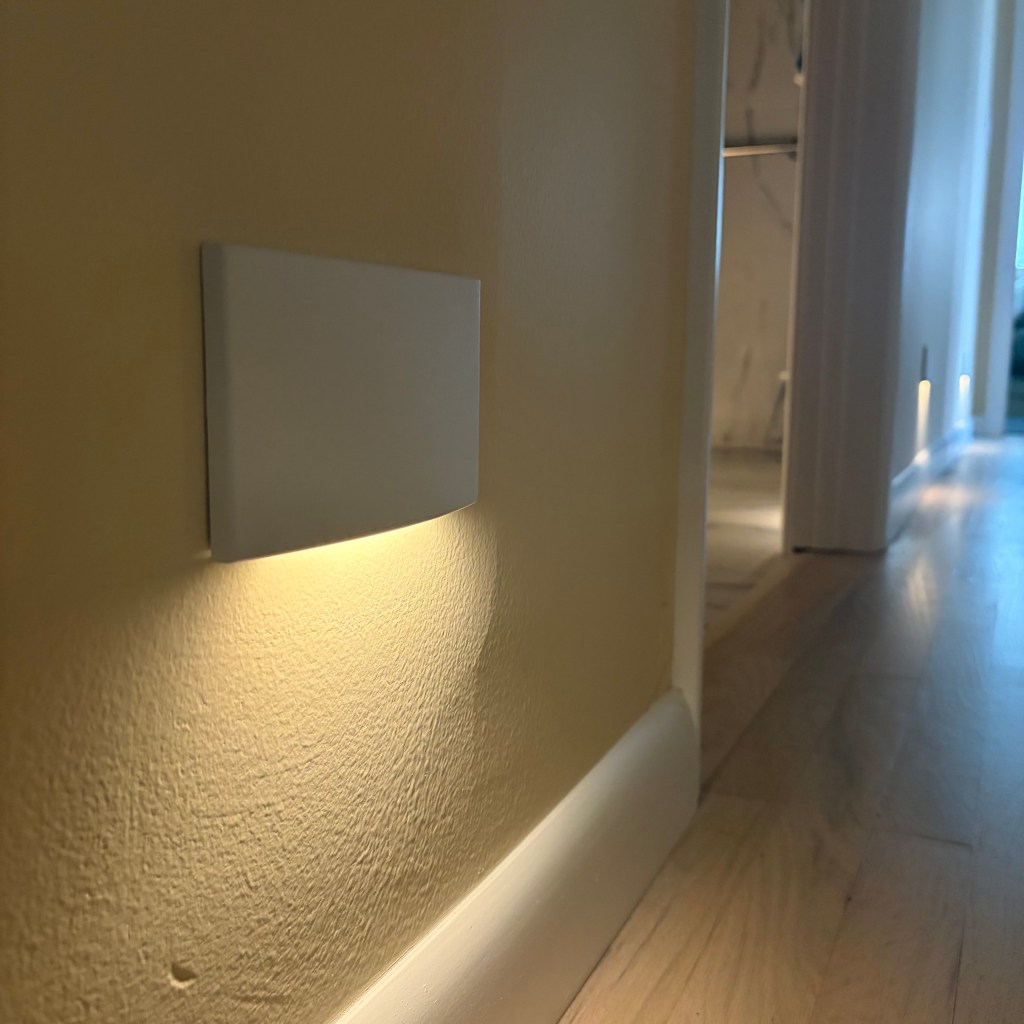
To insure we could safely navigate to the toilets at night, I installed two step lights in each bathroom along with a 24” strip of low lumen output LED Tape under the vanity. In all the bathrooms, (the hall and bedroom, too) I used a full-face WAC step and wall light. The 140 lumens per foot, standard grade tape is from American Lighting.
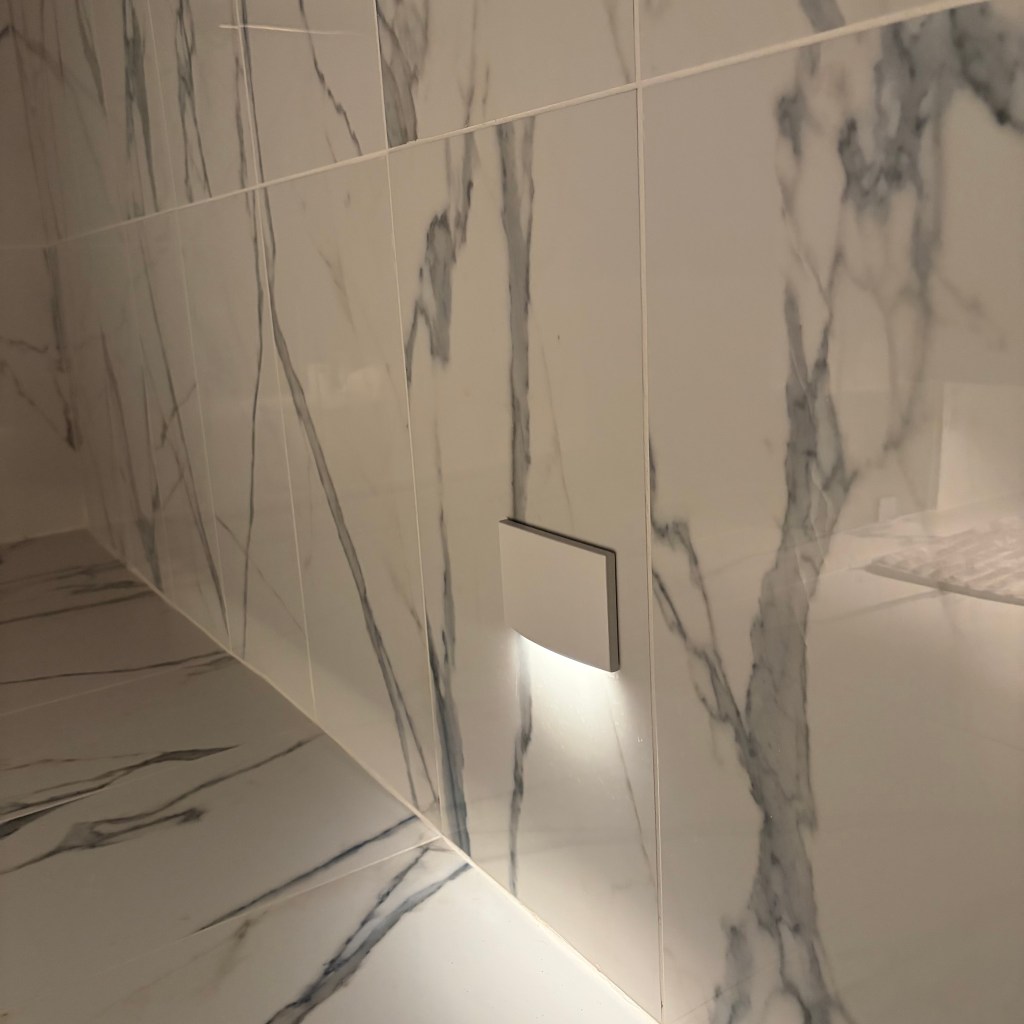
To give us the purest white for grooming, I decided to use 3000K color temperature in both rooms. While I was comfortable with the decision in her bathroom because of the white and blue colors, I was worried that the color would fight the celadon in my bathroom. Luckily, the tile has responded nicely to the 3000K light.
Controls
Each bathroom has four switches. One for the two shower recessed units, one for the mirror sconces plus the over-the-sink recessed and one for the night lighting. A fourth controls the ceiling exhaust fan. The night light switch is part of the Control-4 home automation system so I could configure an illuminated pathway “scene” from the bed, down the hall and into the bathroom.
Illuminance Measurements
My goal was to provide better lighting at the face, and in the shower, in addition to providing better functionality. Nighttime navigation needs only a limited level of light, but delivers a ton of safety. Because the main bathroom does not have a window, the nightlights also furnishes around the clock support.
While it doesn’t matter for her bathroom, I took these measurements at dusk. The sky was clear, the sun had just set, but it wasn’t yet dark, so there is a bit of light coming from the window. (See first line of data.) Because of the wide variety of lighting, I provided a range in the “All Lighting” measurement, rather than an average calculation.
| Type of Light | Her Illuminance Measurement | His Illuminance Measurement |
| Dusk via Window | 0.0 fc | 0.1 fc |
| Nightlight Only – Middle of Room at Floor | 1.5 fc | 2.0 fc |
| Nightlight Only – Middle of Room at Eye Level | 0.21 fc | 0.13 fc |
| Shower Only – Standing at Showerhead at Eye Level | 46.5 fc | 36.6 fc |
| Shower Only – Seated at Eye Level | 20.6 fc | 49.8 fc |
| Mirror Lighting Only – Standing at the front of the vanity Measured at Face | 216.0 fc | 305.0 fc |
| Mirror Lighting at Center of Sink | 190.2 fc | 197.0 fc |
| All Lighting – General Areas of Room | 35 fc to 193 fc | 41 fc to 167 fc |
While both rooms are almost the same size in area, her bathroom is a wider, full rectangle, accounting for some of the “lower” levels of light. (seated shower, general lighting) His bathroom is narrower, with a small passageway at the door that adds to square footage, but not usable space.
Her bathroom benefits from a bit more reflectance because of the white field on the tile. It also has a glossier finish. It does lose some of advantage with the deep blue around the mirror.
Her mirror sconces are flat against the wall with an initial output listed at 2139 lumens each. His mini-pendants are away from the wall slightly, thereby closer to the face, delivering about the same output at 2100 lumens, but a higher illuminance measurement at the face.
These numbers, in general, exceed recommendations, but more importantly, they provide us with the right amount of light, where we need it and when we need it.
Final Thoughts
With the amount of time we spent preserving the original features in the Living Room, Foyer and TV Room, losing the original small bathroom was tough to swallow. We think we could have made the kitsch work and had a lot of fun with the space. When the inevitable arrived, we decided to lean in and create the most carefree bathrooms we could. With no glass enclosure and no shower curtain, a quick squeegee after a shower and the area is spotless. Ultimately, that was the goal of the house. Twenty-two years of living in a historic property skews judgement. As we age, I’m sure we will appreciate the decision more. After 40 plus years of living in older homes with older bathrooms, it is nice to have a fresh, clean, functional and easy to use bathrooms.

