Categories
Technical Lighting Help

How to Effectively Select LED Tape – Part One

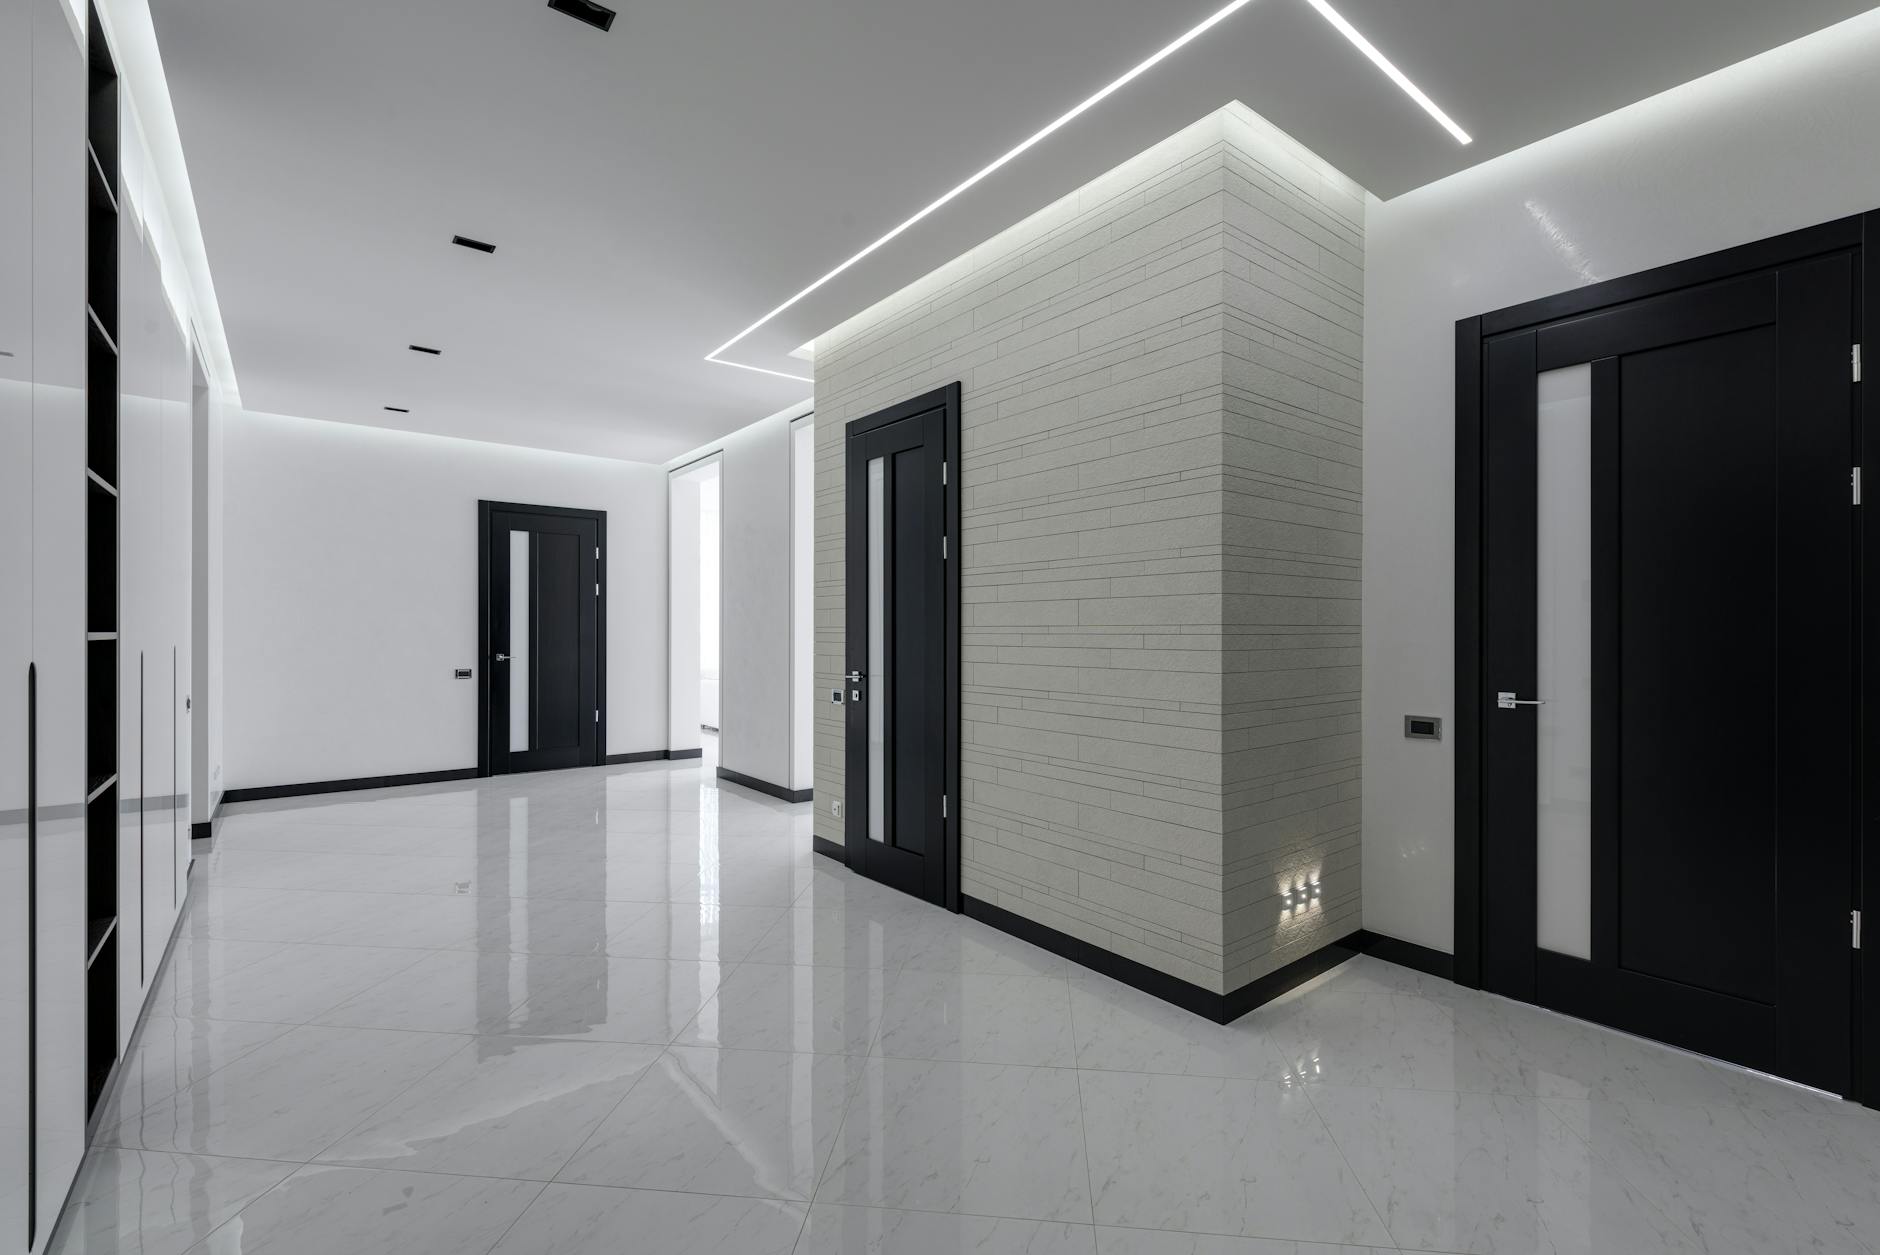
Photo by Max Rahubovskiy on Pexels.com

Since its introduction about a decade ago, LED Tape has become an almost ubiquitous element of lighting design. When introduced, it was the first LED lighting product that was less expensive than the legacy product it replaced. Festoon lamp based linear lighting soon disappeared. (Good riddance! What a horrible product!) LED Tape prices continued to drop and wider varieties and options were soon added. The market is now filled with a massive array of LED Tape, such that a very frequent question is the title of this post. “How do I effectively buy or specify LED Tape?” Put as simply as possible, I recommend using four factors in the decision. Color, output, placement demand and run lengths.

I originally thought I could cram all of this into a single post, but the more I wrote, the more I realized readers might be better served if I went a bit deeper into each section. Part One will cover placement. The next post, Part Two will complete the information and discuss color, output and run lengths.

Placement Demand

Since I began this blog, I have periodically provided some suggestions for LED Tape placement. Avoiding many of the reasons and some details, I’ll quickly recap my location suggestions for a group of the most popular and emerging uses.

  • Above Cabinets – Place the tape 3” from the front edge of the cabinet. Follow the full perimeter edge if variations in depth are present. Place tape on the side of the cabinet, to the wall, if there is a break in the continuity of the cabinet run. (i.e. a doorway, appliance or room entrance)
  • Above Cabinet Alternative (installed as back-lighting or to highlight a wall) – Run a straight line of tape along the BACK of the upper cabinet 3” to 6” from the wall the full length of the upper cabinets.
  • Inside Cabinet WITH Front Fascia – Mount the LED Tape on the inside of the fascia faced into the cabinet on the hinge side. Tape should be run from the top to the bottom. If more light is desired, or if the cabinet is wide, mount a strip on both sides.
  • Inside Cabinet WITHOUT a Front Fascia – Mount the LED Tape on the hinge side wall perpendicular to the door surface. Tape should be run top to bottom. Try to avoid using a run on the handle-side of the cabinet. When the cabinet is opened, it could be too blinding. If additional light is needed in this type of cabinet design AND shelves are translucent, consider a strip along the top. While it will be seen when the door is opened, it will likely be far enough out of sight and cause only minimal glare issues.
  • Under Countertop – A ½” wide by 1/16” to 1/8” deep router about ½” from the front edge of the countertop will accommodate most every tape option. Surface depth of counter might need to be increased. If an ogee edge is used, fabricators have told me that the router cut must start where the full thickness of the material starts. This may require and even larger surface depth. My experience indicates that a granite, marble and quartz stone routered groove may be more problematic than Formica, Corian and concrete. Always review the need with the countertop fabricator. Don’t forget the “mouse hole” that allows the wire to enter the inside of the cabinet!
  • Under Countertop Alternate – If the space between top of the lower cabinet doors and the underside of the countertop is sufficient, the LED Tape can be mounted on the underside surface in a channel without a router. If this option is considered, always check the door swing clearance.
  • Under Island – Run the tape the full length of the island overhang installed about 9” from the chairside front edge of the island top.
  • Toekick – Run the LED Tape along the center of the toekick space. Remember, do not place toekick lighting in front of appliances. Instead, use an extension around the sides of the cabinet and behind the appliance opening so there will be no issue when removing the appliance for cleaning or servicing.
  • Cove – Mount the LED on the wall, just below the front edge of the cove material height.
  • Cove Alternative – Mount the LED on the front edge of the cove material aimed inward toward wall or at the bottom of the cove aimed upward to the ceiling, depending on the desired lighting effect.
  • Drop Ceiling – Mount the LED Tape on the end of the drop panel, about 2” from the edge, aimed up.

Tray Ceilings

There are countless versions of tray ceiling construction. Adding LED Tape here is easy, but rather than providing ten locations, let me provide a few thoughts.

  • Unless using an LED Tape aluminum extrusion where the visible light become a part of the design, try to avoid seeing the LED light. Place them behind barriers of forward enough so direct sign is impossible.
  • Be careful with corners. Linear light that intersects at boxed corners will deliver odd lines and shadows that some people like and others dislike. If you think this could be an issue, test the output prior to finished installation. One option is to cut the tape short of the corner to reduce some of the light patterns you might dislike. Mounting the tape on a different surface will also change the light/shadow patterns.
  • To connect LED Tape corners, a corner-connector is used. Be careful with the wire! It can also lead to odd shadows. Use electric tape and affix the connector wires to the mounting surface so it will not rise above the light.
  • Cove extrusions mounted inside a simple tray construction are a nice way to achieve the same effect with less complex tray framing.

Aluminum Extrusions Aided Placement

Shortly after the creation of LED Tape, installers and designer realized that new and exciting ideas could be realized with the assistance of aluminum extrusions. A row of LED Tape (or two, or three, or six, depending on the extrusion size!) is adhered to the inside of the aluminum. Most have matching diffusers. These combinations have unleashed an avalanche of exciting installation options.

  • Drywall deep light designs in walls and ceilings
  • Inside and outside (drywall) corner illumination
  • Wall wash ceiling perimeter lighting
  • Tray ceiling edge lighting (see above)
  • Step tread lighting
  • Stair rail lighting
  • Lighted baseboard perimeters
  • IP rated floor lighting installation

The combination of extrusions that accommodate various quantities of LED Tape and a little creativity has allowed these options to change interior lighting design.

LED Tape Used In Under-Cabinet Kitchen Applications

The old, self-contained under-cabinet lights used to deliver between 200 and 400 lumens per foot. Because they contain 1, 2, 3 or 4 individual lamps, they were also somewhat spotty. There is virtually no reason to use them any longer LED Tape in a simple channel or in a stylish aluminum extrusion can service the same need, deliver even light across the full length of the countertop AND save a fair amount of money. The only question that need resolution. Can the installation accommodate the required remote power supply? Perhaps it is located in the attic, at the top of the upper cabinets, in the basement or the inside of the cabinet with low-voltage wire traveling to the tape. Determine power placement as carefully as the lighting for the best results.

Once power supply location is resolved, how much light is the right amount of light? When deciding, I ask about the cooking practices of the owner. Are they a gourmet chef, “Heat-n-Serve” cook or a Door Dash practitioner? With that information known, good decision can be made.

  • The gourmet will need plenty of high quality light and it will be used for many hours. Specify the highest lumen per foot options (500+ lumens per foot) from the most reputable manufacturer.
  • The “Heat-n-Serve” cook needs light, but will be opening cans and ripping envelops to mix up a quick meal. The mid-range numbers will serve them well. Find 250 to 400 lumens per foot tape.
  • When countertops are only used to read online menus and find pizza delivery numbers, there is no need to invest in expensive under cabinet lighting. The low lumen output product is fine. Spend the savings on better island pendants!

Lastly, ALWAYS use an extrusion on wood, at a minimum, the low-priced plastic option, when installing LED Tape to the underside of a cabinet. The double-back tape, even the high quality 3M is no match for raw wood. The wood will pull moisture from the tape and before you know it, a sag will occur.

Occasional Demand Use

The client wants to light an area that is used only on birthdays, Halloween and the end of year holidays. If this is the case, consider using some of the readily available “budget” LED Tape options on the market. They are cheap, they may not last 40,000 hours, but for the occasional use, they could be just what is needed. Again, save the money and spend it elsewhere. Conversely, this budget product might be enticing to use everywhere. Don’t do it! It is budget priced for a reason! It will likely fail to withstand the demands of continual use, might have subpar color rendering and the double-sided tape will almost certainly not last.

In two weeks, I’ll post the second half of this discussion and talk about lumen output, run lengths and color.
Categories
Technical Lighting Help

Akira Kurosawa and Lighting

As a follow-up to seeing the English film, “Living” a friend allowed me to borrow his Janus Film copy of the original Akira Kurosawa masterpiece, “Ikiru.” I typically do not watch the “extra features” included in most digital packages, but the interview with the visionary director was too compelling to ignore. The talk was broken into various aspects of his approach to film. One was titled, “Lighting” so of course, I could not help but pay extra attention.

In his conversation on the importance of lighting, he mentioned that to embolden colors that appear on film, he would paint and tint reflector panels that would pick-up the set lighting and bounce additional color with light onto what was being filmed, thereby resulting in more dense, fuller tones. It is the reason why so many of his color films have such vibrant appearances. If you haven’t seen “Ran” give it a watch to understand the value this technique brought to the movie. Trust me, whatever you see on your flat-screen was better in the theater using projection. After so many years, I still remember it.

I started to think about its use in residential lighting. I knew a landscape lighting designer who used seven different gels or tinted blue filters on incandescent lamping to complement each varietal of evergreen, resulting in an otherworldly feel to the exterior spaces he lit. Perhaps the client didn’t know, but he and I suspect other designers certainly did.

Can we bring Mr. Kurosawa’s and my acquaintance’s dedication to color into the interior of a home? In fact, we may have already done that when we introduced LED to the home a few years back.

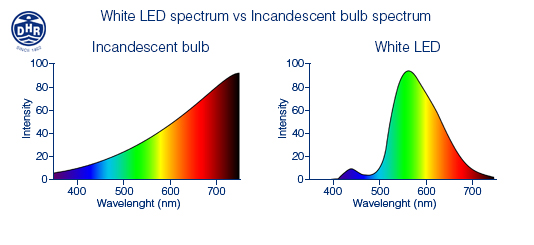
Incandescent light was VERY yellow, rendered dark blue, deep purples and browns poorly, but the amount of red did make it feel “comfortable/warm” to a large majority of the population. LED presents color in a different way because the spectral power distribution (a representation of the amount of each color in the visible electromagnetic spectrum) is different.

Don’t be frightened. The electromagnetic spectrum is easy to understand. Visible light spans from 380 nanometers to 700 nanometers. Ultraviolet light has a smaller measurement than 380nm (it appears to the left) and infrared light is larger than 700nm (it appears to the right.) The visible range begins after the ultraviolet light on the spectrum, runs from purple to blue, to green, into yellow, orange and finally red before disappearing from the human eye’s visible range into infrared light.

In this image, you can see the assortment of colors visibly represented across the horizontal, the intensity of each color is displayed vertically.

The incandescent light features a very small amount of intensity in the purple and dark blue area on the left, hence the reason it is so difficult to “see” the difference between a navy blue suit and a black suit.

All white LED starts with a blue diode that is influenced by phosphors. That blue seed is visible in the LED spectrum as the blue hump on the left, before the huge rise into light blue, green and yellow. The almost nonexistent “red” at the right is the reason humans feel that LED is somewhat cold, or less comforting than the “warm” old incandescent.

The good thing about LED is that the spectral curve CAN and HAS changed since the first LED were introduced into the market. The incandescent curve hasn’t changed since Thomas Edison. That means we have options today that were unimaginable yesterday. A 3000K output will increase the “hump” of blue slightly resulting in better rendering on purple, blues, blacks and even white. With the 2700K white light as illustrated here, the blue is marginally suppressed and the red is increased a bit allowing for better color rendering of warmer colors like beige, yellow, orange, wood and eathtones. Red is a VERY dominant color, so even with substantially lower intensity, it still renders the color well.

Most lamp and luminaire manufacturers now produce 2700K and 3000K LED products, so as consumers, we are faced with a very simple choice. Do we have a “warm” or a “cool” space? If warm, we should select 2700K products, cool means buying the 3000K option.

Akira Kurosawa’s movies are complex and will be studied by film scholars for decades to come. How he achieved some of the results will continue to illicit post-screening, coffee shop conversations for as long as we have movie fans. Choosing color in a residence is decidedly easier. As long as you grasp the underlying science.

Categories
Technical Lighting Help

A New CALiPER for GUV

Photo by Alena Shekhovtcova on Pexels.com

When LED lighting was new, the US Department of Energy began the CALiPER program. The research provided by this series of investigations (spanning 2007 to 2014) was revelatory. I devoured each of these reports as I prepared information to help people understand this new “highfalutin” technology. These were helpful, straightforward and fair reports to the consumer and industry.

The concept was easy to understand. The DOE went to a retailer and bought a dozen (or so) LED products in a similar category, reviewed the enclosed documentation, website claims and marketing promises. The product was then independently tested. The results were compared with the promise and presented in a series of reports released periodically over the seven years. No vendor names were shared. Product identification was blanketed. The intent was to distribute data on the progress of the technology.

At the time, I was working for a manufacturer and I found the information helpful in combating crazy claims by competitors. It was also comforting to see that the results we were getting, were in-line with the realistic numbers unearthed by CALiPER. As someone who helped educate users about this new technology, I could confidently warn them of irrational claims. As the technology improved, the gap between manufacturer’s claims and actual test results continued to shrink. More realistic promises were made. What LED could and could not do became clearer. Each CALiPER report was immensely helpful. When they discontinued the program, it was time. LED had become a mature product category. I would miss them, but I knew they served the industry well. I said a silent “thank you” for a meaningful bank of data.

CALiPER is now back. This time, doing the same yeoman’s work, but instead concerning Germicidal Ultra Violet (GUV) lighting. The first installment is out and I’m almost as excited! (Go ahead, make fun. “This guy gets excited by a US government data report release.” Just keep in mind. I do this so you don’t have to!!) 13 GUV products were reviewed and like the initial round of LED, product claims were wildly in excess of reality. One line from the summary says it succinctly, “This CALiPER GUV Round 1 report demonstrates the significant education and training manufacturers and vendors still require to accurately test and report the performance of their GUV products.”

The CALiPER testing does not review the germicidal efficacy and cleansing capacity, only the light measurement and performance, plus more importantly, photobiological safety when using potentially hazardous ultraviolet light.

It is important to remember that most of the light within the UV spectral range is harmful to humans. “Some” UV is considered “safe” and those same very specific wavelengths of UV have been found effective in combating germicidal pathogens. Some of the units tested claimed to be safe for use when a human is in the room (other units are intended for use when the room is empty) but those did not deliver the UV as promised, potentially causing harm to skin and eyes. Because they have fallen out of the effective spectral range, they might not be very effective killing pathogens either. (Again, those claims were not part of the testing scope.) Light distribution was also reviewed. The analysis found some had a very poor intensity distribution, so while the spectral characteristics might be correct, the light would not necessarily “hit” or reach the germicidal target unless it fell into a very tiny point in space.

The report provides a number of additional findings, including some of the unexpected testing shortcomings. Equipment needed to test UV product is rare and very specific. The agency admits that it could not adequately test some claims because testing agencies don’t have the required equipment. It does raise the question how the manufacturer can make a claim that cannot be substantiated.

This is the first of what could be hundreds of test. More will be learned and the industry will be stronger for this work. The first group of LED MR16 lamps included a product claiming to be an exact replacement for a 50W halogen version and the test showed it barely equaled a 15W halogen. Fewer and fewer of the blatant lies occurred in each subsequent testing tranche. With the increase of airborne pathogens, such as COVID-19, GUV lighting can be an effective combatant. As users, we simply need good data from reputable sources, just like LED lighting. It’s great to know the same review process is now in place.

If, like me you want to dig into the details, links to the actual reports are included below.

Summary Report

Full Report (for the hard-core data nerd!)

Categories
Technical Lighting Help

Please Read the Instructions!

I learned something this week.

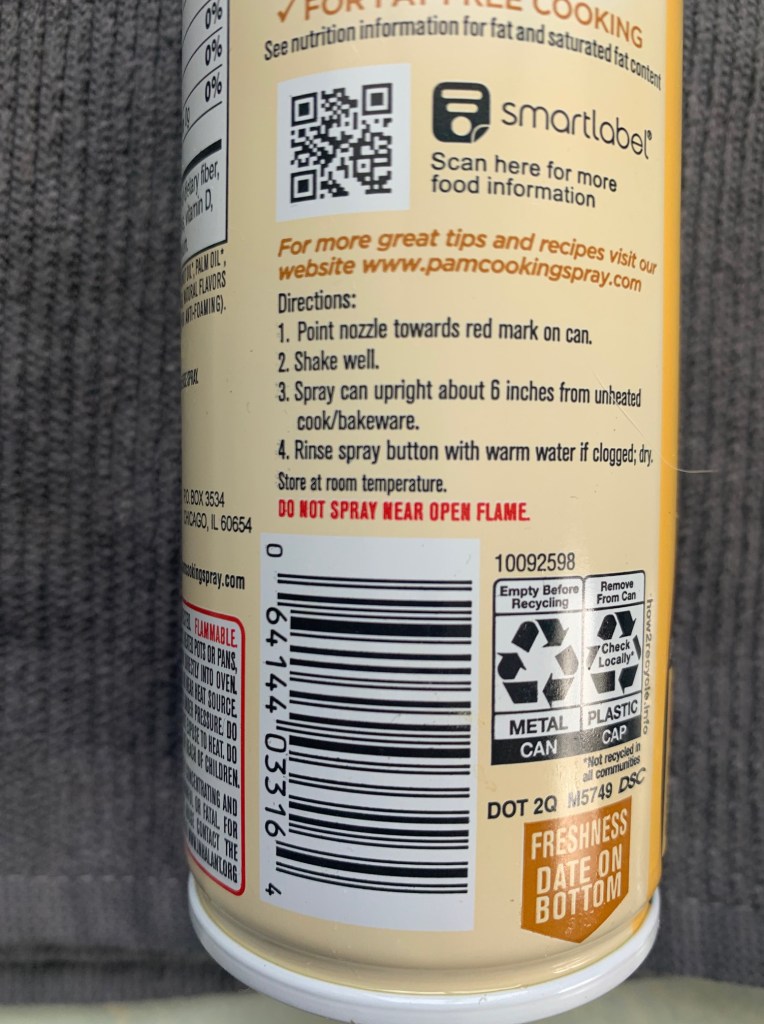
I’ve always thought it odd that instructions on whether or not to shake a product before use were buried in the fine print of a label on the back of a container. I thought it had reached the height of lunacy when I grabbed a can of cooking spray and “read” that I should aim the nozzle, THEN shake the can. It irritated me so, I sent a photo (below) to a friend. In the nicest way possible, he told me, I hadn’t read the instructions.

Did you notice, “…toward red mark on can?” I didn’t!

Instruction step #1 does in fact instruct the user to point the nozzle, but I apparently did not read the remainder of the sentence, “…toward the red mark on the can.” My friend helped me understand that inside the can, there is a hose that brings the cooking spray up into the nozzle and it has been intentionally engineered longer, to extract every last drop from the corner, when the can is tilted during use. By aiming the nozzle toward a red mark on the lip of the can (that I, for the first time found) the entire content of the can will be consumed.

Why didn’t I take as much care with the instructions as my buddy? I was in the middle of making dinner, quickly grabbed the can while the other hand was likely balancing some other part of the meal. A quick glance and bang. I’m done. He saw the second part of the sentence. He also went online and researched the exact reason why it was so important to align the nozzle and the now completely visible “red mark” on the can.

In the process of writing the many blog posts here, I’ve made a big deal out of the importance of doing things according to “best practices” and in accordance with what experts have found to be the most efficient. I have essentially asked each and every reader to “Read the Instructions!” but haven’t been following that same advice when I am dealing with a product that isn’t my core competence.

Likely, we all do this. The plumber probably rolls his eyes when he sees yet another clogged drain and the electrician shivers when he sees an extension cord plugged into another extension cord, under a rug with a splitter on the end. My friend spent a career that included among other things, technical writing and editing. He has been trained to actually read, and actually write (not glance!) at what the author intended. He quickly picked up on what I missed. The rest of us want everyone else to be as sensitive as we are when it regards our knowledge specialty. That typically doesn’t happen.

I was asked by an artists to visit her studio and provide comment on her lighting. She had a feeling something was “off.” As soon as I walked into the space, I cringed. She had replaced all of the lighting with “daylight” LED lighting bulbs. Daylight sounds great to everyone who is not a lighting person. Mother Nature has determined that daylight will be VERY blue, so her studio was extremely blue. All was still not lost. I asked if the bulk of her work was installed in exterior locations. Unfortunately, that was not the case. Most of her work was traditional in nature, warm in color and typically found itself in interior locations. I suggested better lamping options.

Before leaving, I asked how she came to buy these particular lamps. They were on sale. She has the room illuminated for long periods of time while she works. LED consumes less energy. She followed all the instructions, except for those dealing with the color of light. Like me and cooking spray, she knew what a light bulb did and she knew she was consuming more than the average amount of power. She also understood she should find a more efficient way. As I ignored or overlooked, “…toward the red mark on the can,” she glanced over the Color Temperature and Color Rendering Index on the light bulb carton.

Saying “read the instructions” sounds a bit pedantic, but it does make a difference. It’s the reason you are reading a blog post about lighting and probably a reason I have a job. From this point forward, I will try to be more understanding toward those who fail to aim the LED nozzle toward the red mark, as instructed.

Now I just need to get manufacturers to more prominently place “SHAKE” instructions on cans.

Categories
Technical Lighting Help

Switch Placement

Photo by Andrea Davis on Pexels.com

When my wife and I were first married back in the Paleolithic Age, we rented half of a duplex in Shaker Heights, OH. To turn on the light that illuminated the pantry area of the kitchen, you had to slide your hand sideways between the wall and the refrigerator side. The switch was located unusually high on the wall surface and access was only achieved via fingertips. Clearly, not the best placement, but in a century old home, light switches were often placed in peculiar, inconsistent spots.

I recalled this after publishing my last blog on sconce use. A friend dropped me a note after reading my comments about using them in bedrooms, rather than bed lamps. He didn’t mind the idea, but has always felt the switches are placed in inconvenient locations, requiring the skills of a contortionist to activate or reenergize the lighting from a lying position.

He is right. As designers we must design good lighting that performs well and functions in accordance with need. Part of that functionality is adequate access to switching. As a designer, do you plan the switch placement? Do you actively discuss switch placement and preference with clients? If not, you should.

In the midst of thinking about my friend’s input, I went to see the movie, “Living.” Aside from the incredible performance by Bill Nighy, I took note of the alternate light switch placement represented in English homes of the 1950s. English light switches are substantially higher up the wall than a typical North American home. As the actors moved through the movie, they effortlessly and with little conscious thought, engaged the controls. Regardless of who we are in the world, we must interact with lighting with the least amount of effort. That occurs when designers think about it first.

Switches? We Don’t Need No Stinking Switches!

Considering lighting controls moving into the future, it might actually be less of an issue. As home automation increases, I’m not really seeing a long-term need for wall-mounted controls and all of the extra wiring needed to connect them. Were I “Carnac the Magnificent” (look it up) I’d suggest the answer to, “Reduced new home construction, energy savings and increased convenience,” is, “Why will there be no more light switches in new homes?”

Think about it. A small module is connected in the outlet box between the house wires and the luminaire. It is assigned a digital name and voice activation takes over from there. “Google, turn off bedside sconce left.” Diming instructions and even establishing an activation time can be programed into the module. Walking into a dark room will no longer be needed. Lights left on in unoccupied spaced will no longer waste electricity. They will shut off once everyone leaves the area. Seniors will no longer fall on their way to the bathroom (a huge concern for an aging population.) In the future I expect light switches to go the way of iPods, the Blackberry and Flip Cameras. Like all of these antiquated pieces of tech, they will be replaced with your smart phone.

Until Then

Admittedly, switches still have a few more years of use and some people will nostalgically demand their use, despite their upcoming impotence. While we wait for the next trolley, think about switch placement:

  • Where is the best location for placement?
  • In a bank of switches, which switch is first, second and third, etc.?
  • Will standard height placement work, or should this particular switch be located in a different spot for better function?
  • Do I want or need a dimmer here?
  • Will the addition of a motion activated switch or an occupancy sensor switch improve function, user experience or performance here?

A few questions and the sound thoughts all good designers and engineers put into product application and the user will never think about it. That is, after all, the goal of every good designer and product engineer, effortless uncomplicated use.

Categories
Technical Lighting Help

Germicidal UV Light

I recently read that Germicidal UV Lighting (GUV) has not produced the sales manufacturers had expected. The amount of available products has quickly plummeted and there is some thought that with the retreat of COVID, people are no longer worrying about airborne particulates and how to protect their family. With the pushback against common-sense vaccines, even in the face of overwhelming scientific evidence, it might not be surprising. Still, the use of light to help combat germs and viruses remains in play. The method of delivery might shift and change as new ideas arise and research becomes more pointed.

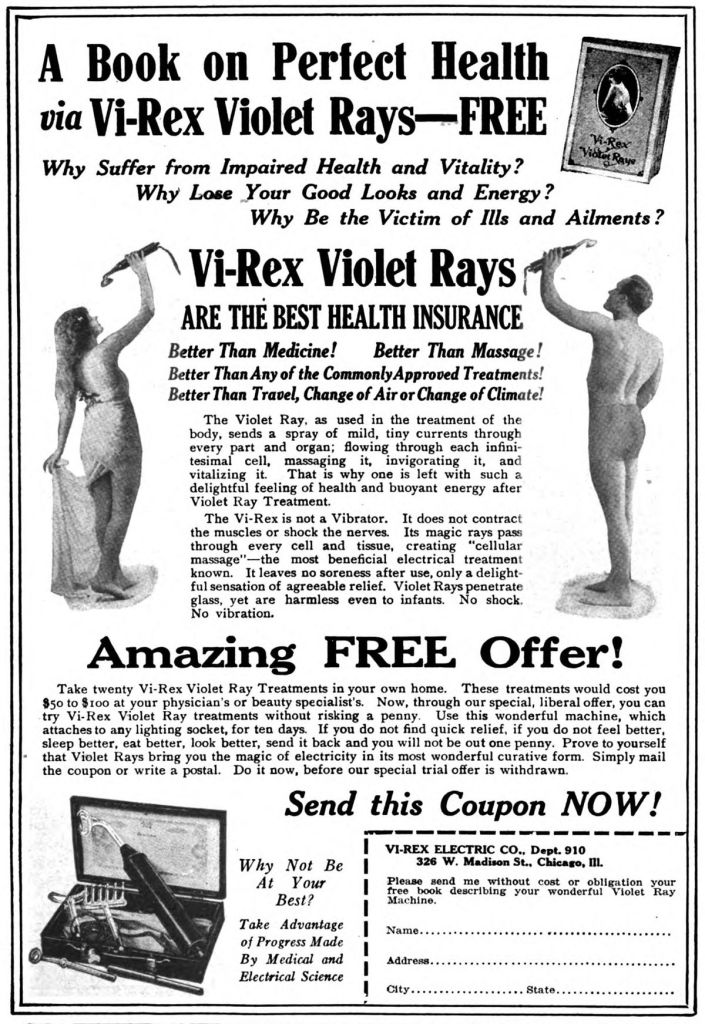
Using UV is nothing new. The sun is often considered the ultimate cure-all and of course, it delivers plenty of light in the UV spectrum. In the 1920s, capitalizing on this understanding, Vi-Rex devices were sold to plenty of vulnerable people based on their promise that the electric shocks of UV would make one, “vital, compelling and magnetic.” I’m hoping that was figuratively magnetic, not literal. SAD lights provide a blast of bright UV-filled light for those who are effected by Seasonal Affective Disorder. This more current application is an equally suspicious solution. Does it really work, or is this the 2020s version of wearing a copper bracelet to cure arthritis?

Essentially, viruses are vulnerable to light in certain areas of the electromagnetic spectrum. By adding that type of light to typical luminaires, we can include an effective germ cleanser. The problem is us. Humans have negative reactions to light in this area of the spectrum. When we stay in the sun too long, our skin becomes sunburnt. This is one, very simple, easy to understand reaction to UV. Science-fiction movies remind us of the many other harmful effects of UV and infrared light. Specific spectrum can be VERY damaging. Some areas are deemed safe, but I still read research papers where the exact specifics of “safe” wavelengths is debated. For that reason, care must be employed when considering this option.

I however remain bullish on GUV. The science is still young, but the results are narrowing toward some very specific results. I expect better scientific direction to arrive soon. Coupled with the constant increase in immune resistant antibiotic bacteria (basically, bacteria and fungi that have developed an ability to defeat the drugs designed to kill them) it appears to me that use is inevitable.

As we enter this New Year to growing reports of increases in childhood hospitalization due to viral infections, added help will be required. If GUV employing better research results can help, we should all be receptive. If the germs can improve their defense against antibiotics, then humans should happily add light to their side of the battlefield. In doing so, we must use them knowingly and with greater and greater understanding of the direction of use provided by carefully derived research.

Categories
Technical Lighting Help

A Happy Lighting Holiday!

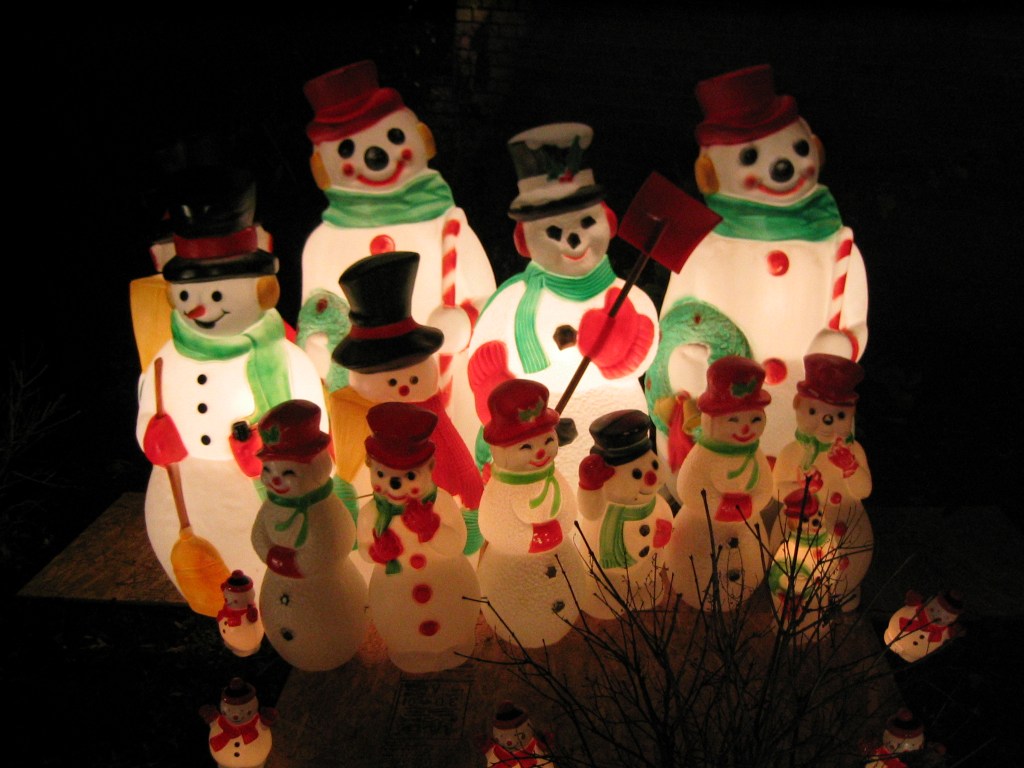
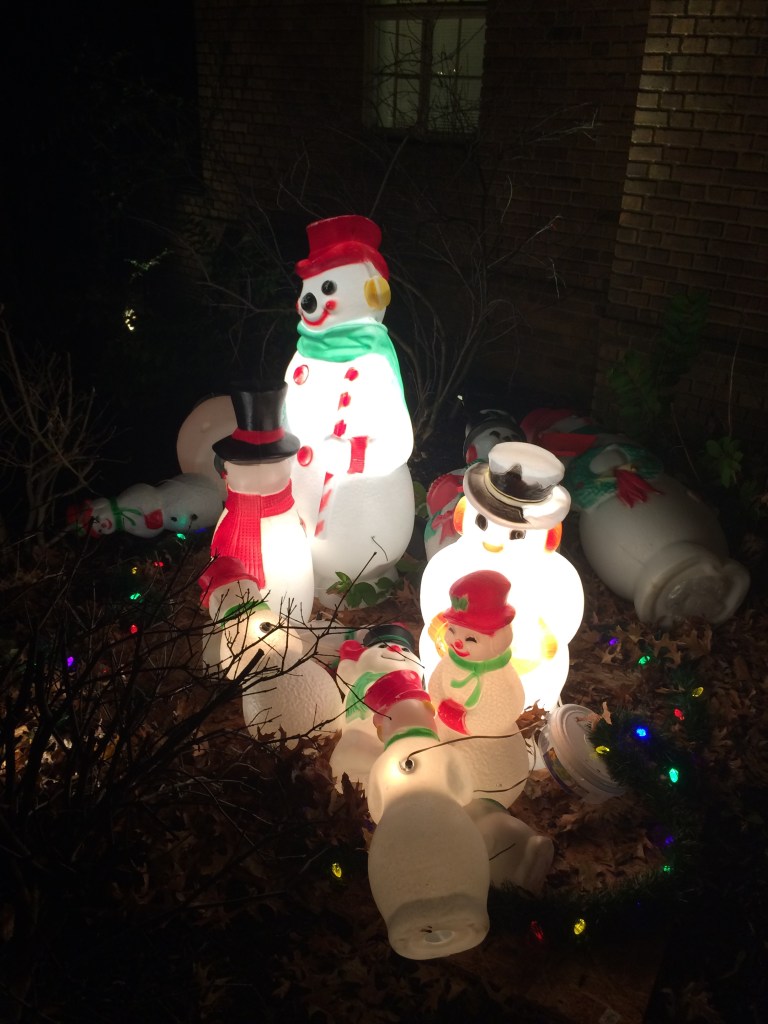
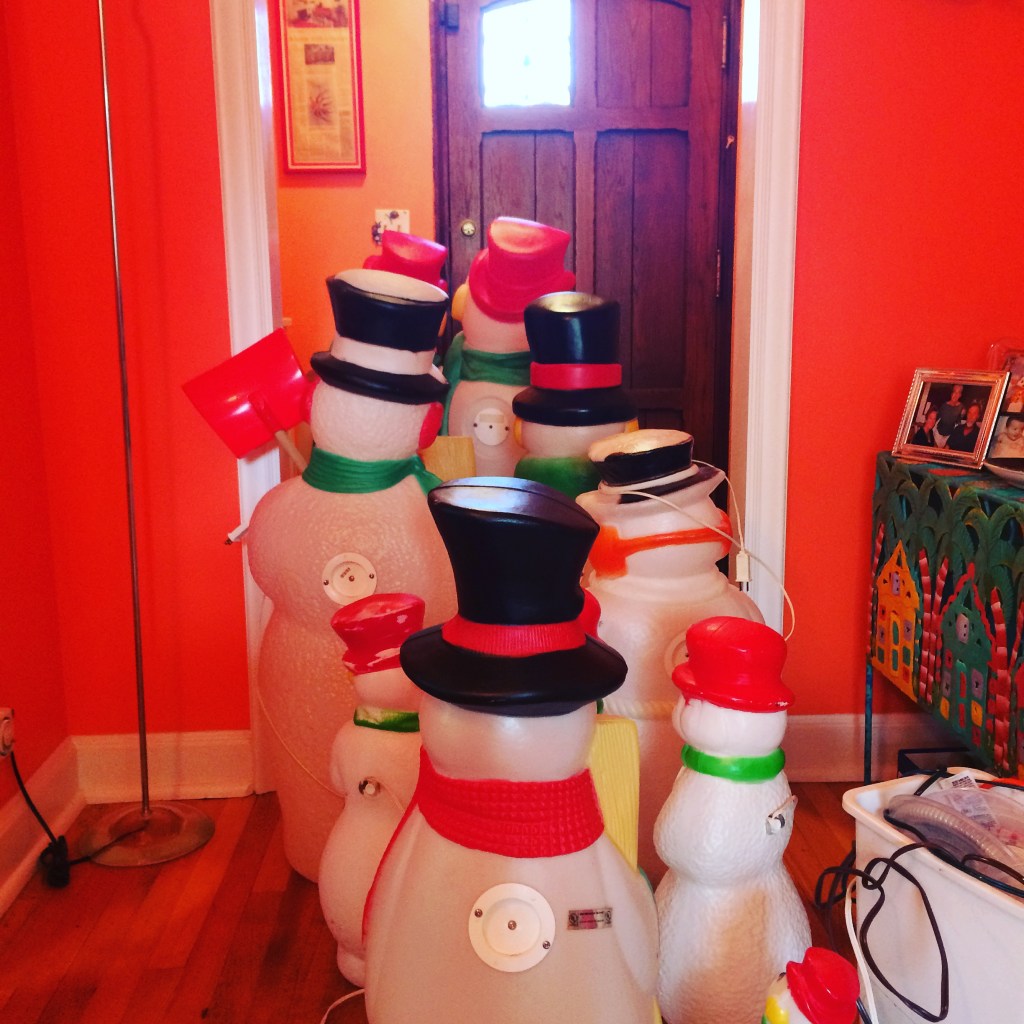
About twenty-five years ago my wife and I started to collect blow-mold lighted snowmen. We bought them at garage sales and end-of-season closeout sales. Before long, friends would call from their own estate sales adventures and ask, “There’s a 4’-0” snowman here. Do you want it?”

In the previous house, we arranged them on the porch in a chorus. When we moved to the current porch-less home, we set them in the flowerbed alongside the front path. On the porch, they were pretty well protected, but in the newer house, they became fodder for vandals. A 10’-0” blow-up snowman, compliments of another garage sale attending friend was dragged across the lawn before the “genius” teen-vandals realized it was tethered to the ground and the heavy blower unit had torn a hole in the sagging white giant’s base. It lay on the sidewalk, exhausted and deflated. No more holiday greetings for this guy.

The last time I set them up, a year ago, another collection of vandals decided it would be fun to knock over the chorus, bowling pin-like. When they fell, of course, some of the incandescent lamps broke.

After the vandals, some of the lighted snowmen were not as illuminating as before! Incandescent filaments are very sensitive.

So why this tale of snowmen and vandals in a lighting blog? The last sentence. “…some of the incandescent lamps broke.” They broke, because of impact. Had I placed LED lamping in the snowmen, it is likely my repair task would have been easier. Stand them back up and I would have been back inside with a hot cup of cocoa ten minutes later. Instead, I had to open them all and replace all of the lamps…and it was COLD! LED are much more resilient to vibration and impact. The fragile filament could not handle being thrashed to the ground. LED, like the blow mold snowmen themselves bounce back, unharmed.

There is another reason to consider using LED lamping in your lightened holiday menagerie. Heat. I was reminded of this by a friend when he began setting up his holiday decorations. Most of these items came equipped with a very low wattage maximum. The large 4’-6” snowmen have labels warning against anything over 40-watts of incandescent light. That warning is not there for illumination maximization, but instead, because of heat. If too much heat was generated, the plastic snowman, might begin to look like the blow-up version the kids destroyed a few years back, all melted into a puddle, or at the very least deformed in some way.

A 40-watt incandescent lamp delivers 450 lumens of light, but creates a fair amount of heat at the same time. Because the LED lamps create a fraction of the heat, increasing the lumen output is now possible. My friend called because his decorations appeared “dark and gloomy.’ He wondered if he could increase the lumen amount to brighten them by switching to LED. A jump to 800 lumens (a 60 watt incandescent equivalent) consumes about 11 watts of power and will be cooler than the 40 watt incandescent, despite an almost doubling of light output.

This year, as you bring the holiday décor down from the attic, remember that re-lamping with LED will save you some money on electricity, but it also could invigorate your gloomy lighted treasures and make them that much more festive.

To everyone, have a great, well-lit holiday season and stay tuned for more tips and information on lighting, from your friendly neighborhood lighting geek, as we move into 2023!

Categories
Technical Lighting Help

Hey! My Light Bulb Doesn’t Fit!

Since the introduction of fluorescent and LED retrofit lamping designed to take the place of incandescent light bulbs, fit has occasionally been a problem for consumers. Sockets are designed for the shape and contour of incandescent glass envelopes. Because of ignorance or lack of detail, poorly realized retrofits lamps on occasion, do not “fit” or function.

Why?

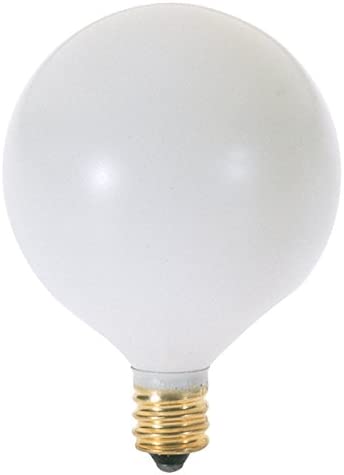
Fit has especially been a concern with “globe” or sphere shaped lamps (“G” type, as ascribed by the industry.) To understand the problem, let’s first look at an incandescent G-16 ½ candelabra based lamp. Many people call these golf ball lamps because of their similar size. Similar issues may occur with larger, medium-based “G” lamps, as well.

A typical G-16 1/2 Incandescent lamp.

With a full glass envelope on the incandescent product, you can see how the blown glass envelope gently tappers into the screwshell (the threaded portion at the base of a lamp.) The screwshell makes contact with the electricity delivered inside the socket.

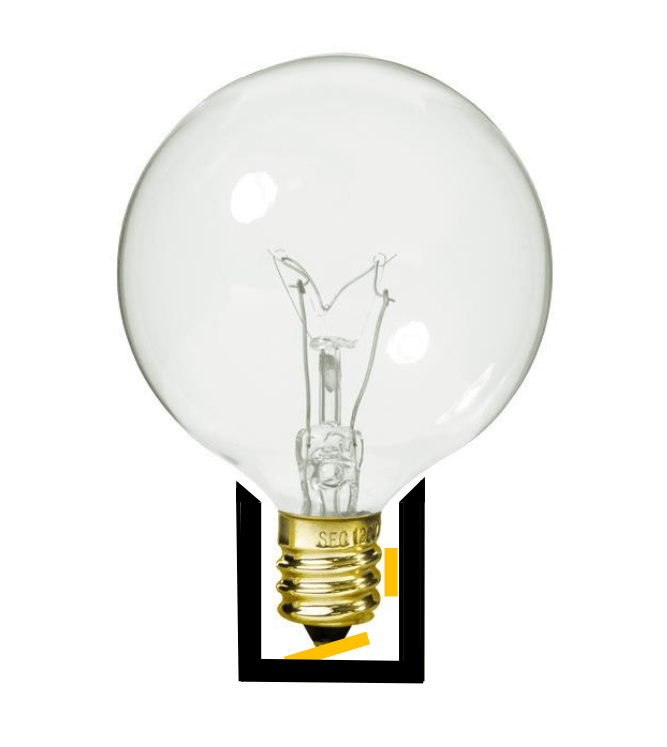
A typical incandescent G-16 1/2 lamp installed in a candelabra socket. Note the base touches the copper tab at bottom of the socket and the threaded side touches copper on the side.

When inserted into a socket, the “hot” side of the electric current touches the bottom of the light bulb via a small copper tab at the inside bottom of the socket. The negative, or neutral half of the electric supply is provided to the screwshell on the inside edge of the socket. The positive and negative contacts are represented in the image as gold rectangles.

Also, note how the rolled edge of the glass curves into the screwshell and curves around the tapered inside edge of the socket. This insures the bottom of the light bulb easily touches the contact at the bottom of the socket.

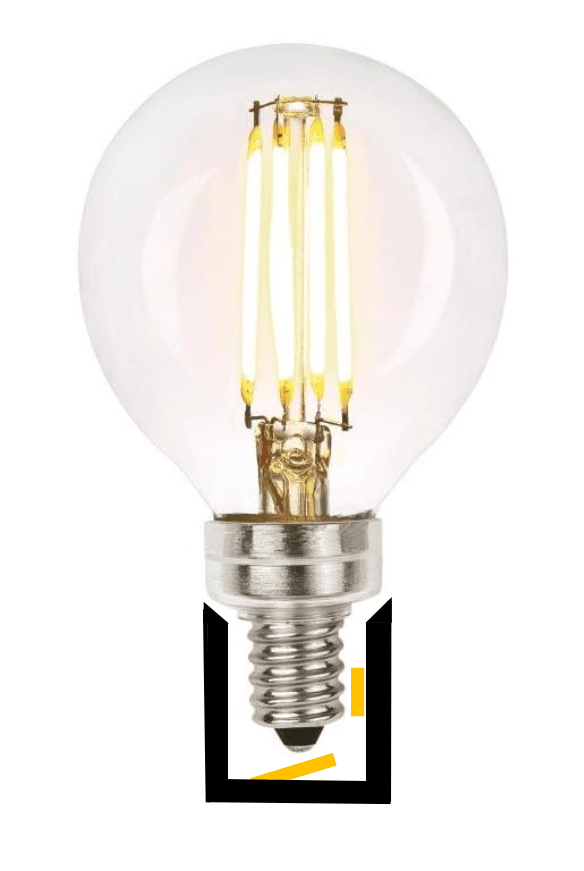
LED retrofit lamps create light with the use of a collection of electronics. Those electronics are located in the area between the glass envelop and the screwshell. In the photo below, the chrome sleeve under the glass houses the electronics.

A LED retrofit G-16 1/2 lamp. One of many styles available in the market.

When we insert the LED retrofit lamp, the chrome sleeve prevents the screwshell from fully turning into the socket. When that occurs, the bottom of the light bulb cannot touch the copper tab and the light bulb will not function.

A LED retrofit G-16 1/2 lamp installed in a candelabra socket. Note: the collar under the glass envelope prevents the base of the lamp from making contact with the copper tab at the bottom of the socket, thus preventing a complete electric connection.

Many people, when experiencing this failure believe it to be a LED lamp malfunction, but it is really a design failure. In instances where the socket is slightly wider, the copper tab is sitting higher or the edge of the socket is shorter, the lamp will work without an issue.

What to Do?

If this is an experience you have, the best thing to do is buy a different brand lamp, one with a better contour between envelope and screwshell. Some screwshells have also been elongated. If an alternative is not possible, there is one other thing you could do, but it must be done with care. Usually, the contact between copper and light bulb is millimeters away from making contact. A gentle lift of the copper tab could be all that is needed. It could also be unusually flattened over years of use. The reason for caution is electricity. We tell children not to shove things into electric outlets for a reason. An electric shock, a short, or worse can happen.

If you’d like to try a solution, shut off the switch on the wall and trip the circuit in the electric panel or unscrew the fuse in the fuse box. BOTH are a MUST!! Do not go any further without completing these steps!! (Seriously, unless you like the feeling of 120 volts of electric power coursing through your body, do not move forward without shutting off the power at the circuit!)

With a long, strong, wood or plastic stick (chopstick, knitting needle or crochets hook,) gently pry the copper tab up EVER SO SLIGHTLY!! As said, the gap is a fraction of an inch. There is no need to exert Hulk-like power! Reenergize the circuit and turn on the switch. If it does not work, it is time to try another brand of replacement lamp.

Expect Things to Get Better

Retrofit lamps are getting better. The electronics are getting smaller and even the least sophisticated manufacturers now understand what could be inhibiting a full electric connection.

I live in a historic home build with a two-car garage in the basement. This was quite an unusual feature for homes in the late 1920s. At the time, cars were substantially narrower and much longer than the average car of today. Consequently, I have no storage at the sides of my garage, but the front is packed solid with all the things we house in our garages. Moving the car in and out of the garage requires skill, with about 2” of room separating the rearview mirrors and the door frame, on each side.

Like newer cars and my garage’s elongated shape, the new light bulbs can and will work on sockets designed for a different era of technology. Just a little skill and patience is required.

Categories
Technical Lighting Help

Shooting Ourselves in the LED Foot

If you have read any number of my blogs posts, you know I am “bullish” on technological advances in the home. I was involved, early-on with adopting LED to residential products. I firmly believe smart home automation is inevitable and self-controlled residential environments are going to be more common than not. That said, the lighting industry has NEVER been a tech-industry and as such, they are wholly unprepared to deal with problems, such as quickly evolving and improving products. This inability has gotten them into trouble with consumers.

A friend called last week. He was trying to re-lamp his dining room and foyer chandeliers with LED retrofit candelabra lamps. In a previous conversation, I suggested he stick with a major brand, buy all the same product at one time and I also gave him color temperature (CCT) recommendations. (This is advice I also give to industry personnel and related design professionals.) He needed 23 lamps, so he “cleaned the shelves” at a local retailer. The ladder was out, the lamps were going in and once he had finished, he noticed a difference.

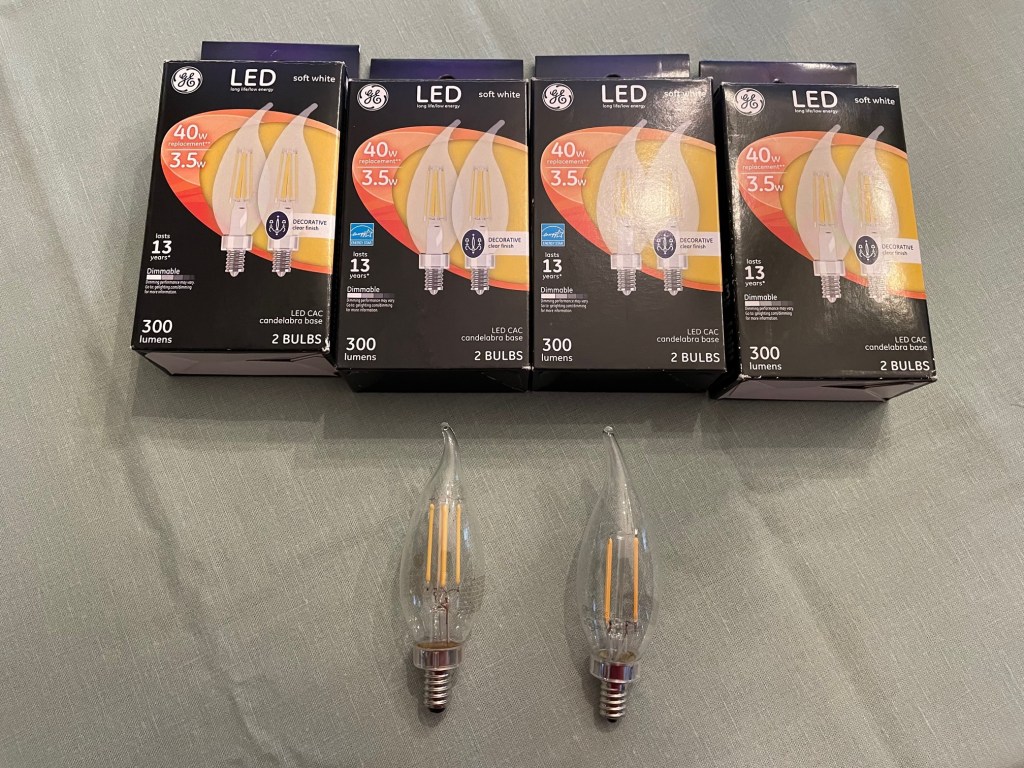
To create an LED version of a flame-shaped candelabra lamp, the engineers have strung LED into bands to visually replicate the appearance of a filament. Most of the lamps employed two bands of LED, but a handful use four. While the lumen output was equal, the appearance was different.

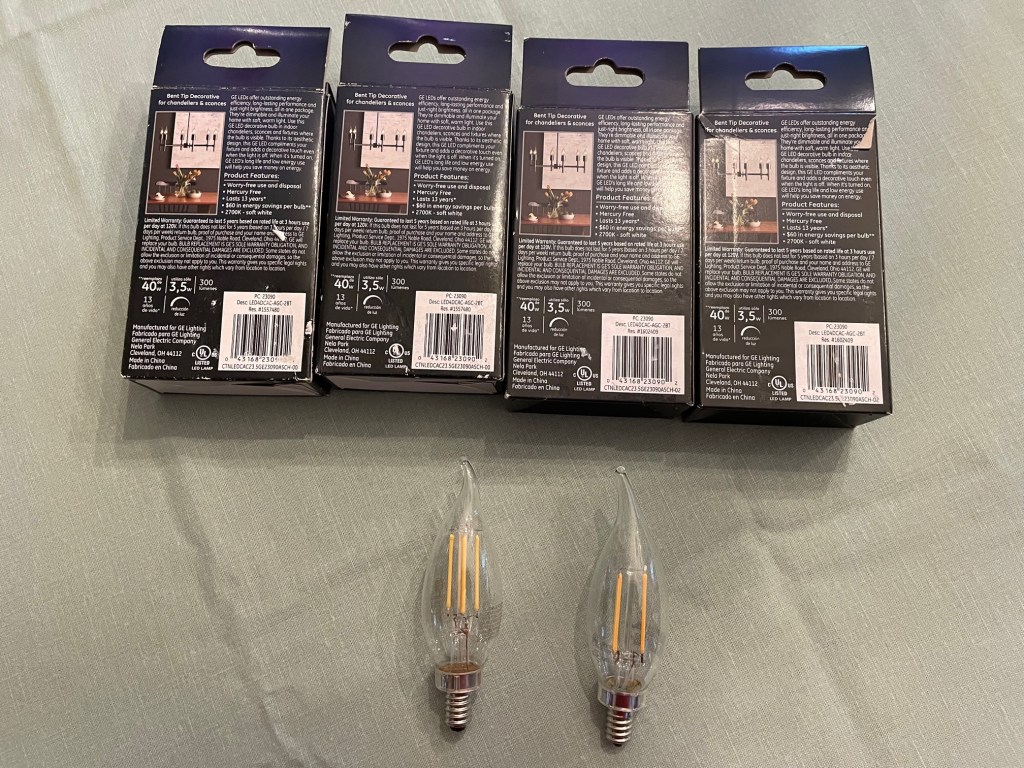
The packaging was the same. Lumen output was the same. The UPC number was the same, as were two additional sets of numbers. The rub arrived in the sixth number printed on the back of the carton. There lay the difference.

My friend did all of the right thing. He consulted with a lighting expert (me!), bought the same brand product with the same color characteristics, bought them from the same retailer, at the same time and still got burned. Honestly, I wonder if I would have noticed the variation and I have been helping people buy the correct lighting for almost a half-century.

The exact same lumen output, wattage consumption and carton appearance, but inside were decidedly different looking lamps.
The same PC number, the same description code, the same UPC number, but a different Res number, the only indicator that there is something amiss.

The incandescent light bulb you bought in 1985 is exactly the same as the ones on a shelf today. That is how consumers currently relate to light bulbs. It is also, apparently, how major manufacturers treat them. It is time for them to do better so the consumer can easily transition to the new world.

Visit your local Best Buy and ask them for a 2015 Samsung flat-screen and you will be laughed out of the store. There are a ton of iPhone 8 still in use, but you cannot buy a new one. Technology companies, with rapidly changing product know how to get the correct version to their customer. Lighting people do not.

I recently bought a sleeve for my iPad and could not complete the order without including the model and version. A small, one-person, technology support supplier making hand-stitched, felt covers for computers, iPads and phones has adapted her business to the multiple versions of tech products. It is time for the lighting industry to up their game. We are not living in Thomas Edison’s world any longer.

For a long time, I have indicated a preference for new integrated LED luminaires, as opposed to socketed luminaires using retrofit LED lamps. That works for most product, except where the lamp is a part of the aesthetics. Integrated luminaires will not have this problem.

We still live in an incandescent world, we are incandescent-inclined, we are born into a world where lighting fixture maintenance and repair is an innate skill. We feel compelled to change light bulbs. This will be hard habit to break. Dumb missteps by lamp suppliers will make the path harder, not easier.

Categories
Technical Lighting Help

Lighting Safety

Photo by Tim Gouw on Pexels.com

Perhaps one of the most highly regulated types of lighting is that which is placed in closets. Over a year ago, I wrote a whole blog post on deciphering the nuances of the National Electric Code requirements concerning this rather obscure light placement. https://lightingbyjeffrey.com/2021/03/29/closet-lighting/

At the start of the late 1970s energy crisis, efficiency gurus urged homeowners to add more and more insulation in their attics. That, unfortunately trapped heat in ceiling mounted outlet boxes. The increased temperatures caused wire insulation to melt.

Fabric, stacked against poorly placed electric lighting in closets and disintegrating electrical wire insulation, both resulted in fires. The NEC added stricter requirements for closets and Underwriters Laboratories recognized the root cause of increases in fires and elevated the testing requirements, now performed in insulated ceilings. These are safety measures aided by outside oversight. Are there steps the average homeowner can take to insure safety? Here are a few thoughts.

Obey Wattage Labels

Since many of us are using LED replacement lamps, ignoring wattage labels is becoming more common. Try not to become complacent, especially if you are still using incandescent lamping. Wattage labels are a meaningful part of the safe operation of your light source.

Especially problematic are those applications where the lamp base (the threaded portion of the light bulb) is position in an “up” direction. (Remember your high school science, heat rises!) If a 60W maximum is specified and a 100W light bulb is used, the envelop size is the same, but the temperature created is substantially higher. That means the wire will be exposed to hotter temperature levels and deterioration can result.

My mother had a pole lamp that she could not live without. It was illuminated all evening, she read, did puzzles and knitted using it and when she couldn’t see well, as cataracts took more and more of her visual clarity, she simply increased the light bulb wattage. Of course, eventually it stopped working. I got a call to “fix her light.” My first reaction was replacement. “No! I like this one. You’re a lighting guy. Can’t you fix it?”

After I tore the pole lamp apart, I found barely functioning wire. It was all brown and brittle. The Bakelite sockets fell apart in my hand. Were she not a self-sufficient person, a fire could have easily destroyed her home. I rewired it with heavier wire and porcelain sockets. Go ahead mom, use whatever wattage you need. It is built for maximum wattage now.

Unfortunately, not everyone has a son, who is a lighting guy. Most people can’t teardown a fifty year-old pole lamp, rebuild it for higher temperatures and set it up for another 50 years of use. To avoid that, follow the wattage labeling instructions. (Please don’t call me! Rebuilding pole lamps are a pain in the keister!)

Obey Mounting Labels

Many luminaires are engineered to function in a specific direction. A “mounting direction” label indicates “This End Up” to insure proper operation. I’ve mentioned multiple time my neighbor, who has his porch light mounted upside-down. Were it not for the eave above, the unit would fill with rainwater and electrically-short, causing serious damage. He didn’t pay attention to the mounting instruction. Don’t make the same mistake as my neighbor.

Adequate Kitchen Lighting

How often would you walk through a dark room with a sharp object ¼” from your carotid artery? Unless you share some character traits with the Marquis de Sade, this adventure is unlikely. Why then would you cut carrots on a poorly lit countertop? When we bought our current home, there was a single light on a fan in the middle of the kitchen. When we cleaned the room prior to moving-in, I was surprised there were no finger segments that accidentally fell behind the refrigerator! To avoid parasuicide, install proper lighting. General kitchen lighting should be of a recommended level with supplemental under-cabinet lighting a must.

Nighttime Navigation

Attempting to walk from the bed to bathroom at night continues to cause numerous injuries that accelerate with age. Regardless of our familiarity with the surroundings, we still need the aid of light to traverse this short distance. Consider one of the following:

  • A motion activated light under the bed. Once your feet touch the floor, a sensor detects their presence and turns on a light.
  • Include a switch next to each side of the bed, connected to a light that travels the distance between bed and toilet. I recently recommended this idea to a client. The bed was centered in the bedroom with entrance to the bathroom from two directions, one on each side, for each of the sleeping partners. We connected the switch to a few junction box-mounted, aisle lights in the hall and a strip of LED Tape under the vanity counter. On the opposite side, the second switch illuminated different hall lights, but the same under-vanity light. The owners were extremely satisfied.
  • Remember that all nighttime lighting should be aimed downward and indirect. The reduction of glare will be easier to use with sensitive night vision in place.

Stairs

If nighttime navigation is the number one fall risk in a home, stairs are second, again, especially egregious for seniors. Find those areas where steps and staircases reside in the dark and add some light. Look for landings and step treads that are the same color. Consider steps used regularly at night. Solve the problem with step and aisle lights on the adjacent wall, or use strips of LED Tape under each tread. Railing is also sold with an embed strip of LED Tape, or it can be easily added to an existing rail. Regardless of the method, light the stairs!

Safe

When we think of safety in a home, our mind snaps to bathtub falls, silent CO2 gases and errant fireplace cinders. We might not automatically think about eliminating some of the other, more popular incidents with correctly placed light. Light can help avoid incidents, but we should avoid lighting misuse incidents, as well. Paying attention to both will make the home a much safer place in which to live.