I have been writing a speech about LED Tape for delivery to a group of Interior Designers and Architects. Midways through, I wondered if there was really any reason for the old under-cabinet lighting fixture. Has the need been replaced with LED Tape?
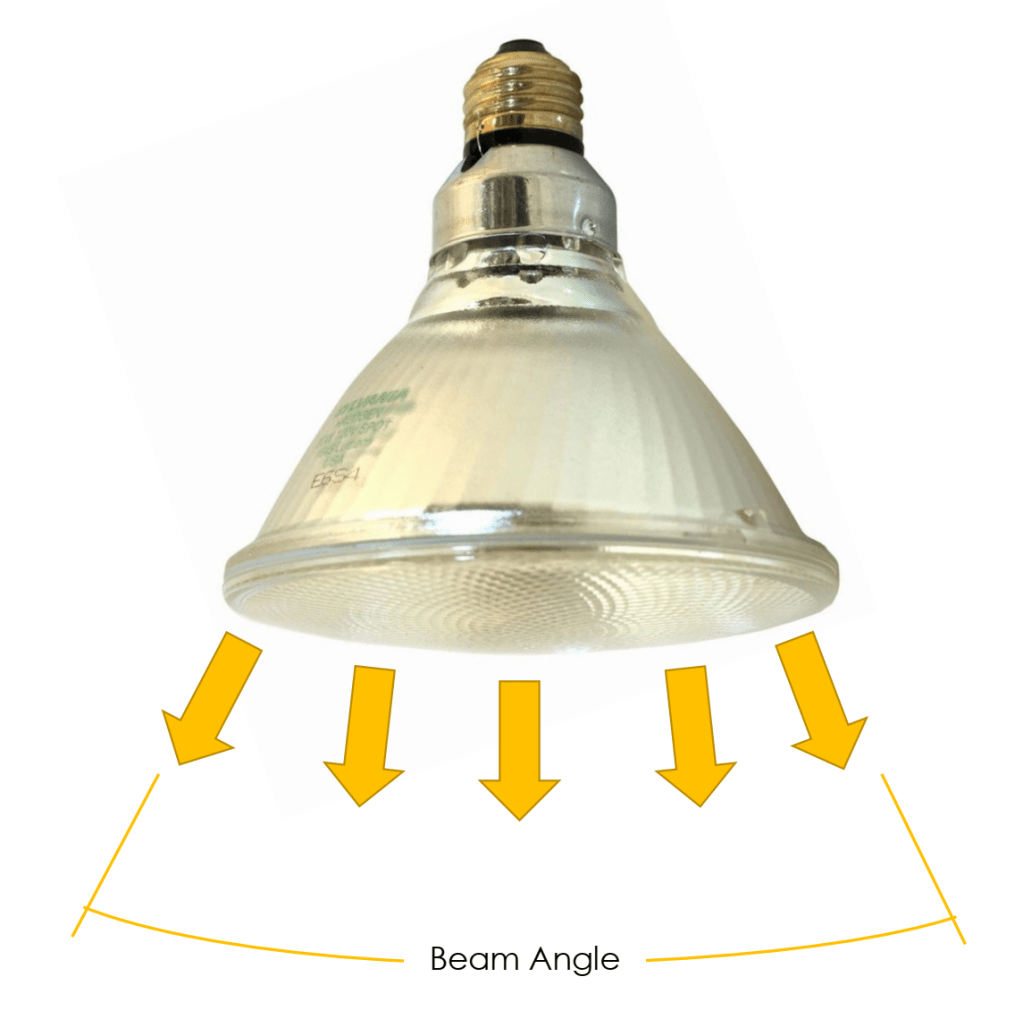
In the 1990s and early 2000s, undercabinet luminaires were flying off the shelf. It was as if people finally realized that more light on the countertop was going to help them see while cooking. Sure, the old, clunky fluorescent units were around forever, but they never made it into every home like the Halogen versions. Halogen was new and exciting. When Xenon eventually replace Halogen lamps and people realized they did not have to scorch the wood on their cabinets to get good light, popularity again jumped. A new home, or kitchen remodel simply wasn’t complete without lighting on the underside of the cabinet.
That was an important evolution in the understanding of Light Layering. Lighting, properly positioned for the specific intent of illuminating the area on which a task is performed, helped people understand the value of all light. Working in shadows wasn’t necessary. You did not need to “make due.” Lighting could be helpful. There were side benefits as well. Indirect illumination magnified the backsplash and made it look fabulous. It made the room pop. In a subtle way, it began a journey for homeowner’s appreciation of the third layer, Accent Lighting.
Accent lighting was however, expensive. The linear systems were complicated and the spotty light was provided by finicky festoon lamps. They were a pain to install and a bigger pain to keep functioning. When LED Tape arrived, the linear festoon systems disappeared like a truck at a David Copperfield show.
The original rationale for sticking with undercabinet luminaires was the large amount of light output. Like the Copperfield truck, that logic is also disappearing. To achieve lower costs, many of the available under-cabinet units are reducing their lumen output, thereby eliminating the one advantage they had. When cost is the only determining factor, LED Tape wins, hands-down. A one-foot section of LED Tape is substantially cheaper than a 12” undercabinet luminaire.
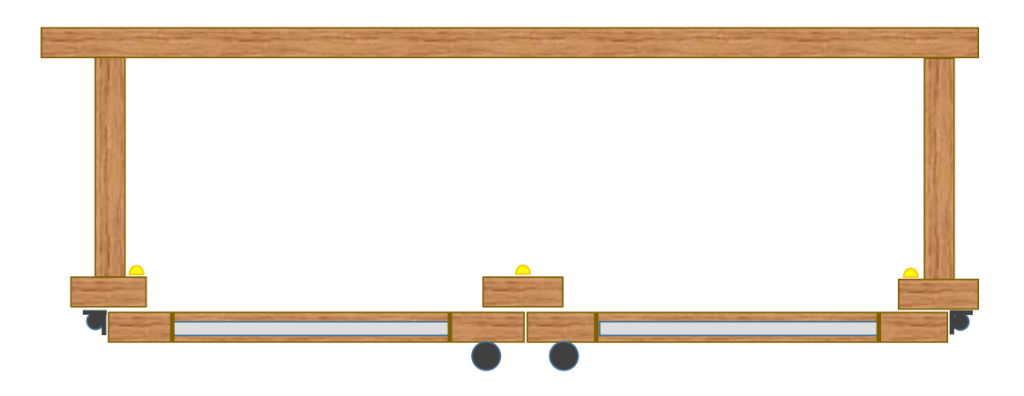
Under-cabinet luminaires do provide a very clean installation, with no unsightly wires (usually.) That installation is however dependent on a specific type of cabinet construction, which is also disappearing. [Insert reference to David Copperfield and a truck.] Finished bottom cabinets, European cabinets, the rise of “shelf only” upper storage and faux façade kitchens means that undercabinet luminaires are quickly turning into the millennial version of a buggy whip.
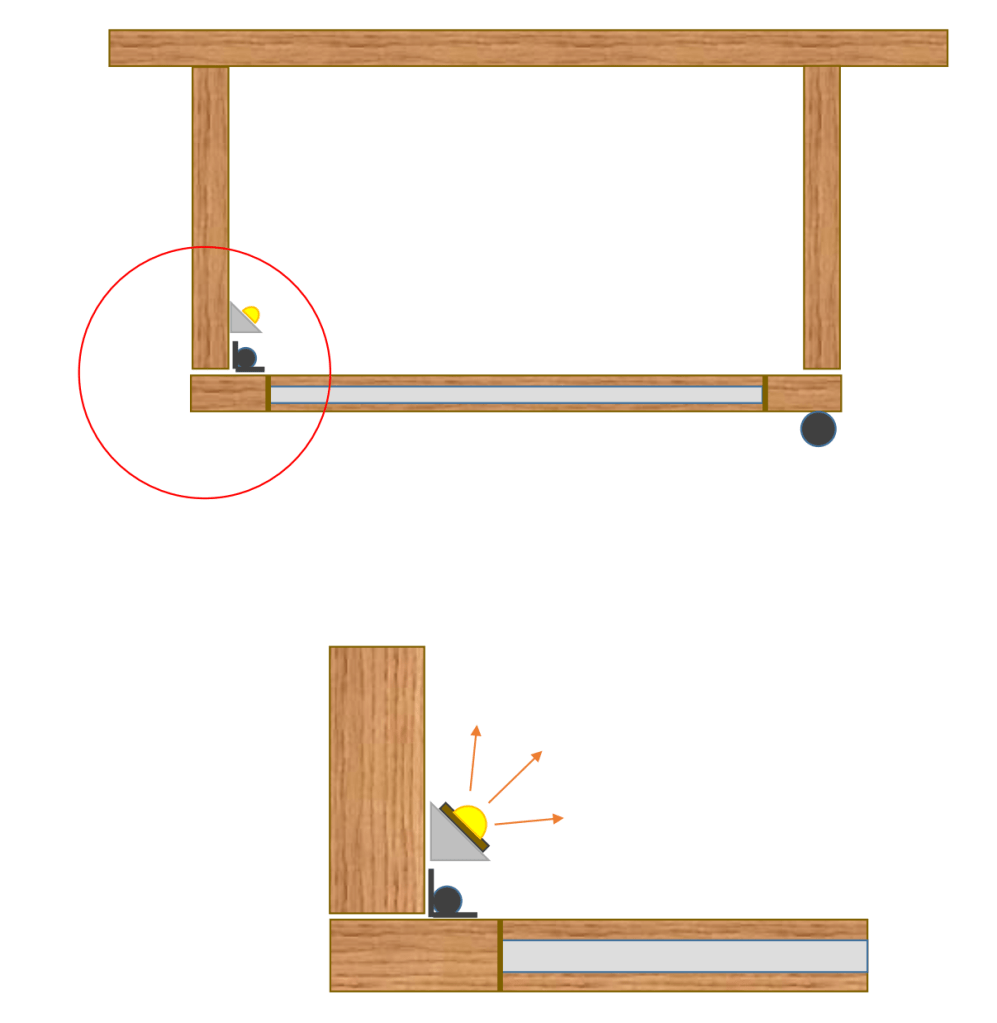
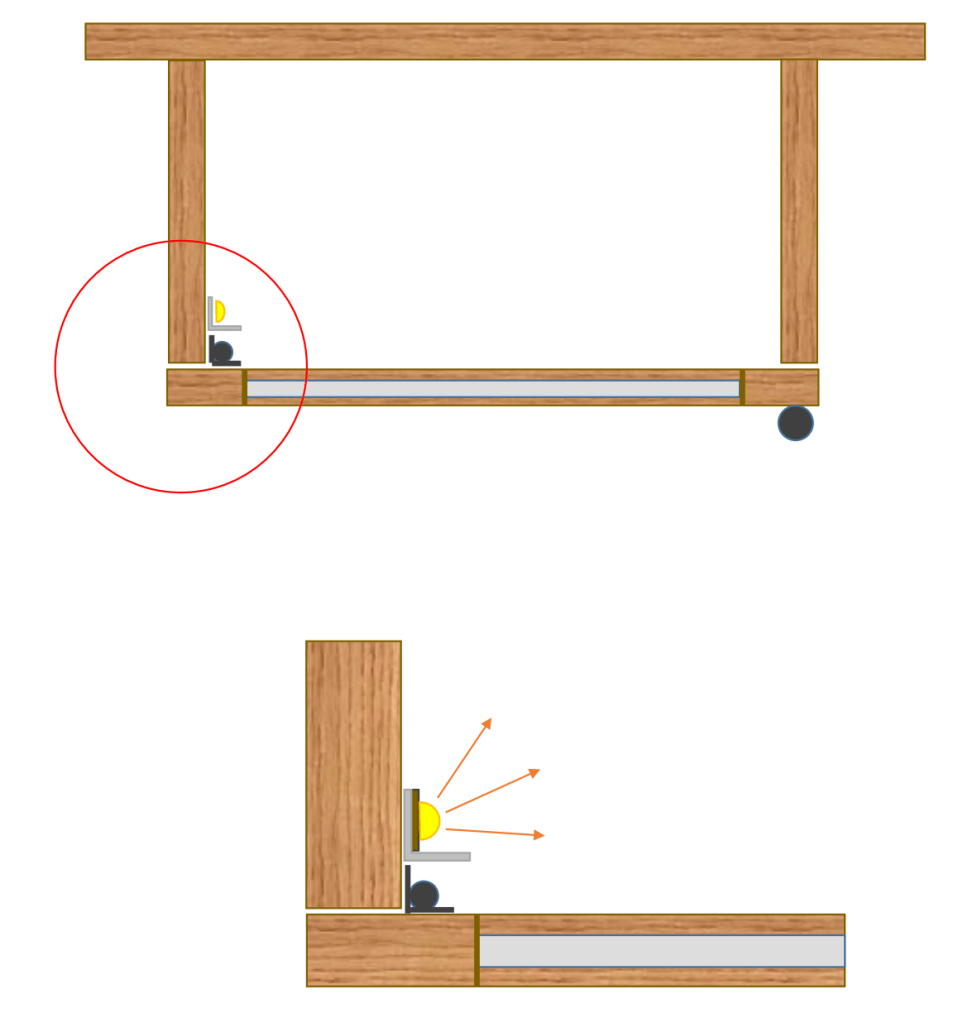
LED Tape has advantages, too. Light is cumulative. Adding a second strip will double the output. There are scores of channels and extrusions now on the market that will dress the LED Tape to make it more visually appealing. Angling the tape to put more impact on an expensive backsplash is likewise very easy. Cost, always a concern, remains very low.
There are things that are still needed. LED Tape could use a simple, clean and small transformer/driver that could be more easily hidden and connected to the 120V input. Rather than the “matchbox” shapes, is a flatter, wider, longer option more usable and less noticeable? Could it be hidden in a more decorative element? Like the rest of the kitchen before it, this utilitarian room with workaday equipment has been transformed into a highly desirable and aesthetically appealing space. We should expect LED Tape to follow suit.
New kitchens and kitchen remodels are evolving into LED lit environments. Recessed cans are now LED, toekick lighting, above cabinet lighting and inside cabinet lights are LED. Some of the most stunning new decorative designs feature LED. It is inevitable that all under-cabinet light will eventually switch to LED Tape encased in some sort of trim. When those 12”, 24” and 36” rectangular boxes of light are gone, you might think David Copperfield had something to do with it, but you’d be wrong. This time, it was the maturation of LED Tape.