A designer called me a few weeks ago with a simple question, “Where should I place LED Tape inside a cabinet?” While deceptively simple, a one sentence answer turned into a response with multiple provisos. With LED Tape inside glass front cabinets, there are a few approaches, depending on the cabinet construction, size and content. Here are my recommendations.
The Typical Installation
Normally, I use one strip of LED Tape installed on the hinge-side of each door. This tack works for most cabinets with a light-colored interior, average door sizes and typical content. Should the cabinet be wider, a second door and a second strip of LED Tape would be installed. Remember, use tape at each hinge. That solves a large percentage of the cabinets in North America.

Cabinet Construction
Many cabinets have a face on the front. When that occurs, the LED Tape should be mounted on inside of that face surface, aimed into the cabinet.

If there is NO front face on the cabinet, (sometimes called frameless) the LED Tape should be installed perpendicular to the door on the side panel as close to the front as possible. Please be mindful of the hinge and its moving parts! The door will hide most of the light, but the light on frameless cabinets will be a bit more visible.
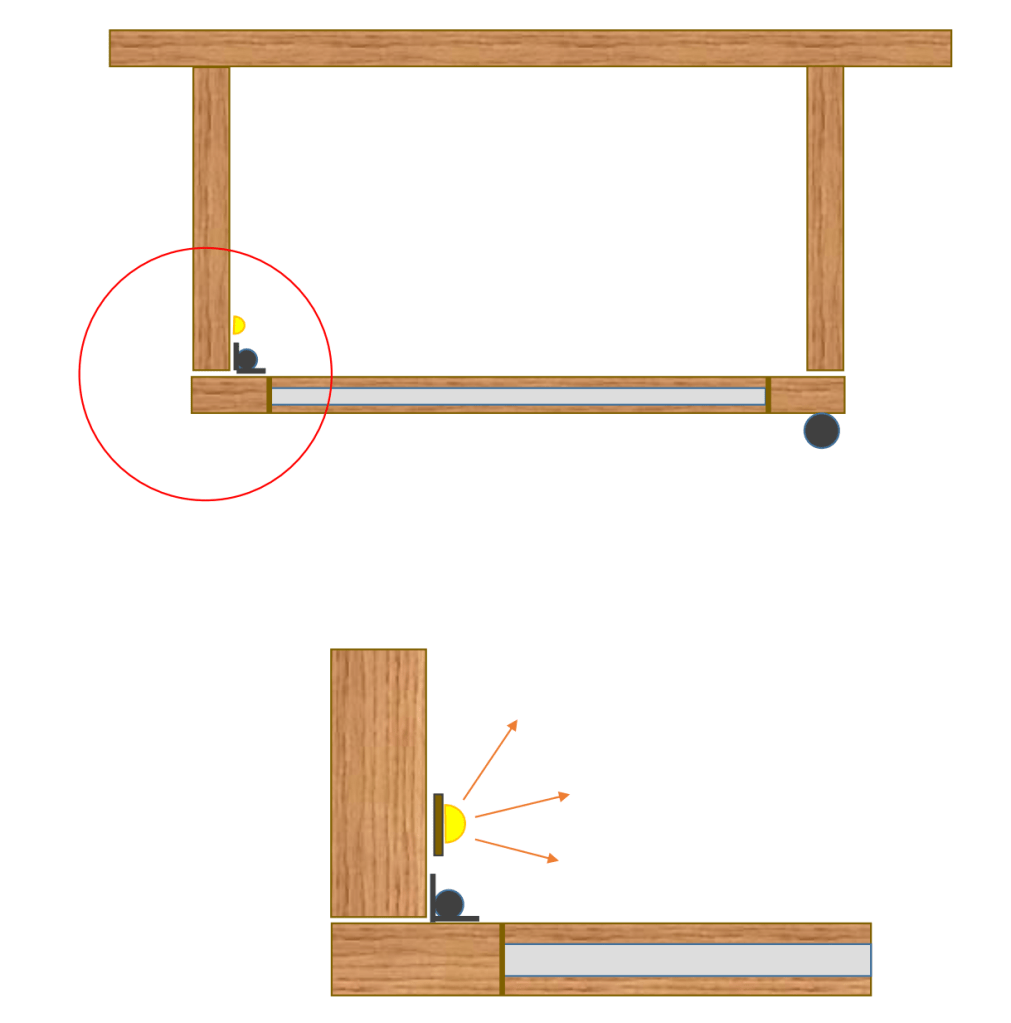
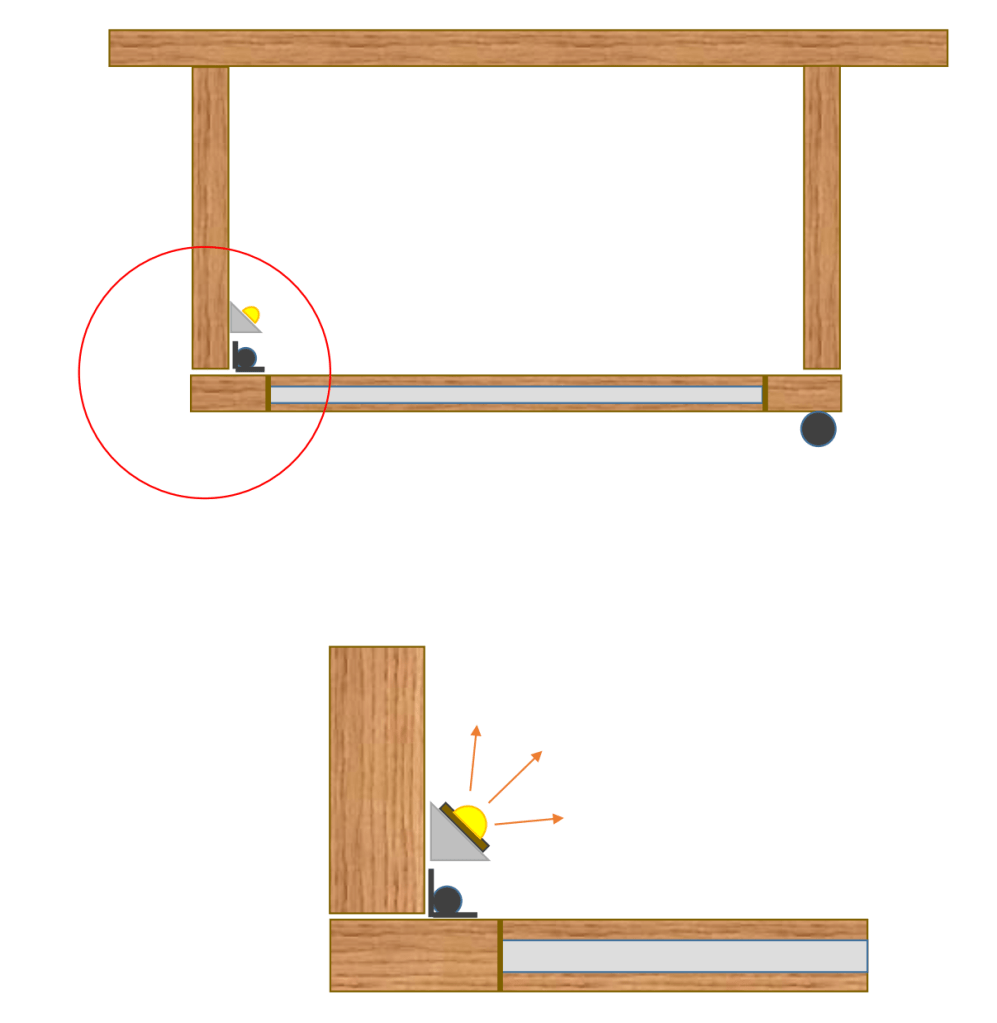
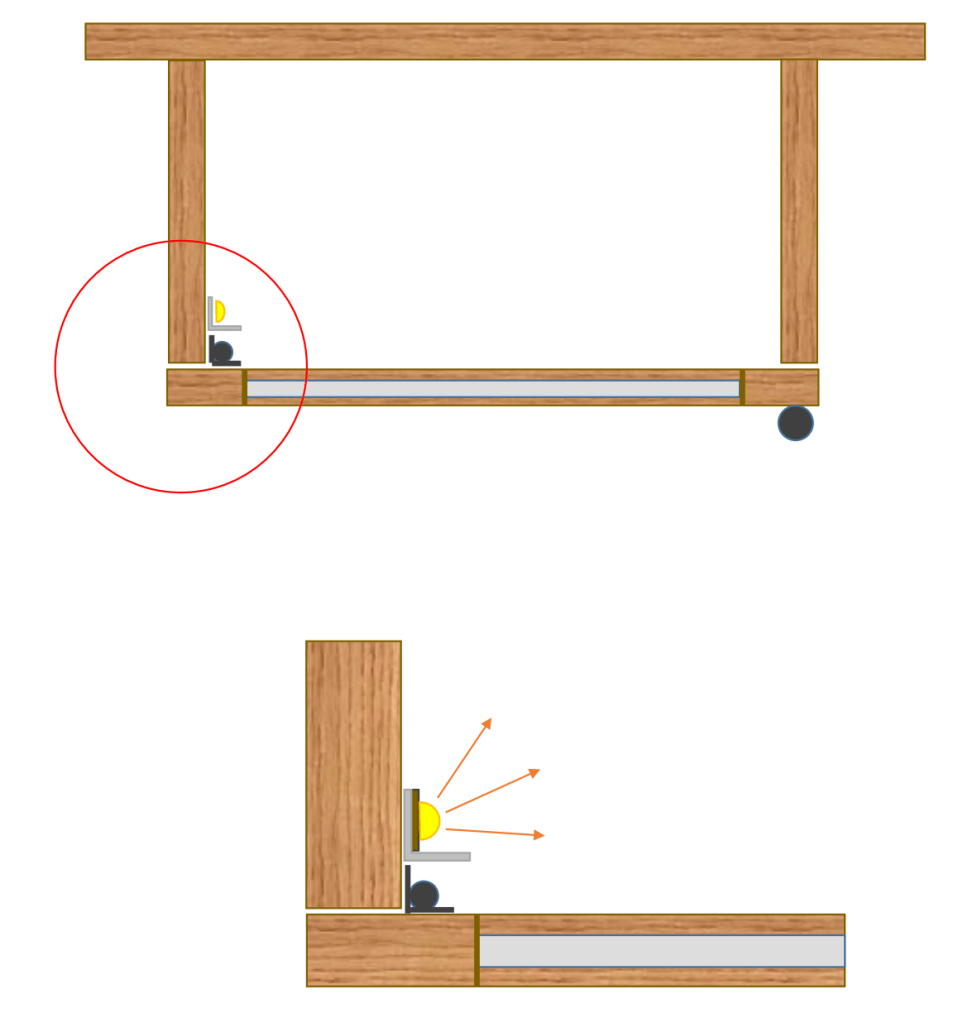
If the visibility is objectionable, all LED Tape manufacturers sell aluminum or plastic channels. Two options work, a ½” x ½” 45° channel or a ½” x ½” “L” channel. The 45° channel would be installed in the hinge corner. The LED Tape would then be connected to the 45° angle, aimed into the cabinet at an angle. If you elect to use the “L” channel, install the channel against the side with one legs of the “L” facing the front. The LED Tape is installed on the other leg. The forward leg of the “L” will block the view of the light from the user.
If the top of the cabinet is open to the ceiling, drill a 1/8” hole in the corner, pull all the wire to the top of the cabinet and make all wire connections above and out of sight. The same could of course be done under the cabinet, but that would be much more visible and often found objectionable.
Cabinets Used For Display or Cabinets With Dark Interiors
Employ two strips of LED Tape on glass front cabinet if they are used to display prized crystal, collectables or something of higher value. Consider using two strips if the inside of the cabinet is especially dark.
With two strips, one will of course be at the hinge and the other on the handle side. With framed cabinets, this installation is easy. The LED Tape is installed on the backside, aiming inward. For frameless cabinets always use a channel.
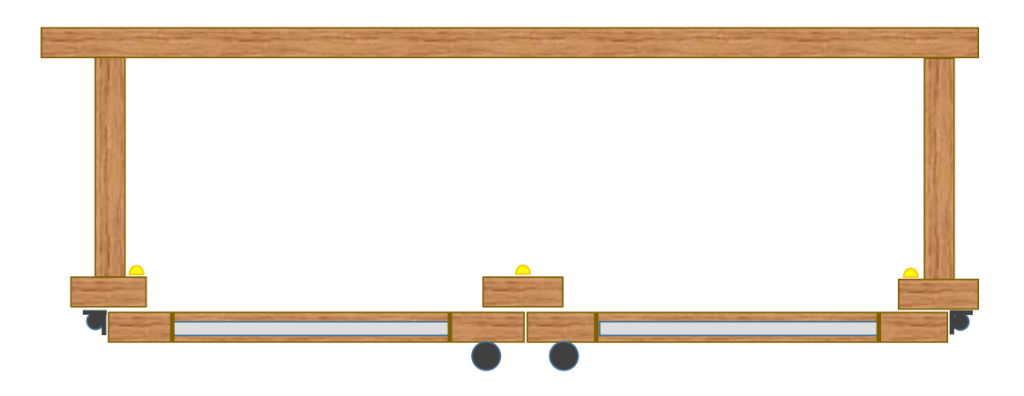
Include LED Tape across the top when a two-door cabinet design has no center divider. You’ll want more light, especially if the width is such that you will end up with a darker area in the center. Lighting across the top is also needed if horizontal flip doors or lift doors are used. If light is included at the top, remember to use a channel (again, unless there is a front panel). Without the panel or channel, when you look-up, you will definitely see the light and that will be unacceptable.

Any Alternatives?
I prefer LED Tape on cabinet verticals because regardless of the shelving material, the entire cabinet is illuminated. Disc/Pucks only work with glass shelves and only when nothing is on the shelf. Because, you do not want to see the light, only the effect, the front surface is always preferred.
If you find a spot where you want to try something different, the only other option would be the bottom of the shelf at the back/rear. Remember, this will deliver more shadows, but with the right content in the cabinet, this could be an interesting option.
What Type of LED Tape Should I Use?
Most LED Tape comes in low, regular and high output. Inside a cabinet, low should be acceptable, again, unless you are dealing with dark colors or featured pieces. You might want to test the light output in specific applications with a small section of LED Tape connected to a transformer plug. This will allow you to see the output for yourself, should you have a concern.
Lighting inside a glass front cabinet is easy, until the installation varies from the norm. With these alternative and optional installations, you’ll be ready for anything a cabinet throws at you.

One reply on “LED Tape and Glass-Front Cabinets”
Thanks for a great readd
LikeLike